
In this blog post, we’ll walk you through the steps of using the xpub of your Ledger hardware wallet in combination with bittr. If you would first like to know a bit more about extended public keys (xpub, ypub, zpub), we’d recommend you to read this blogpost first.
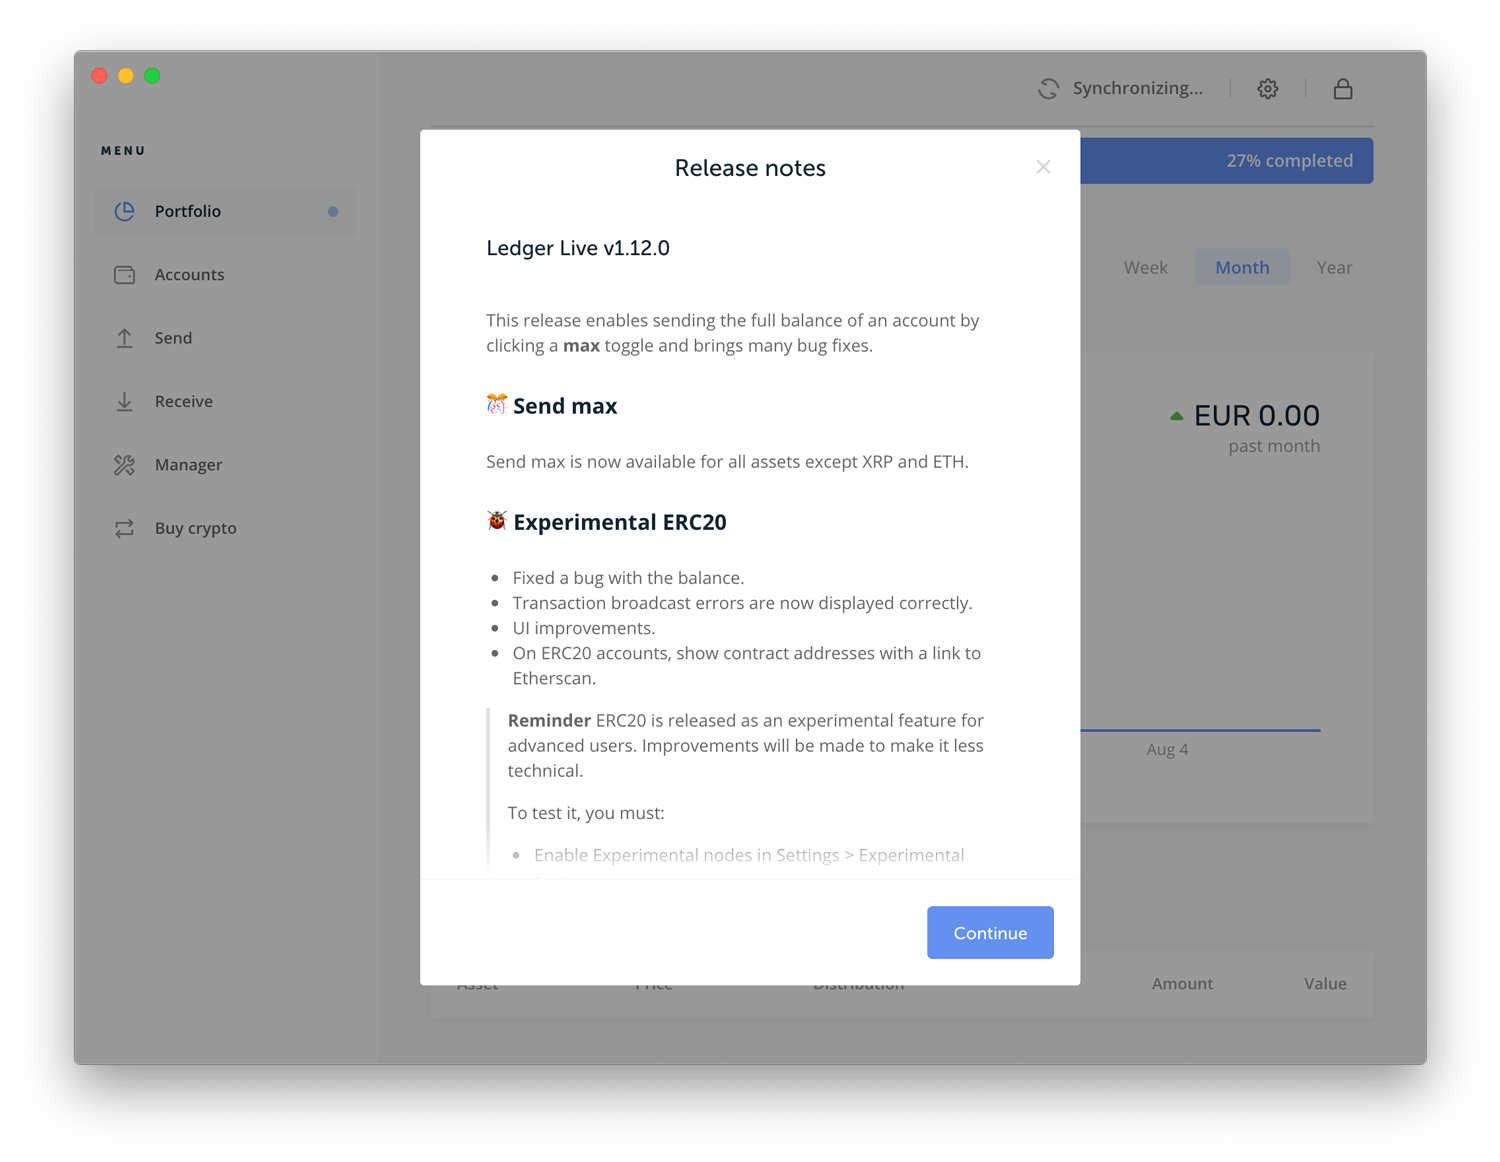
First of all, it’s important to update your Ledger hardware wallet, as well as Ledger Live. Older versions of Ledger Live did not provide support for native Segwit addresses, which are required if you want to use your Ledger xpub with bittr.
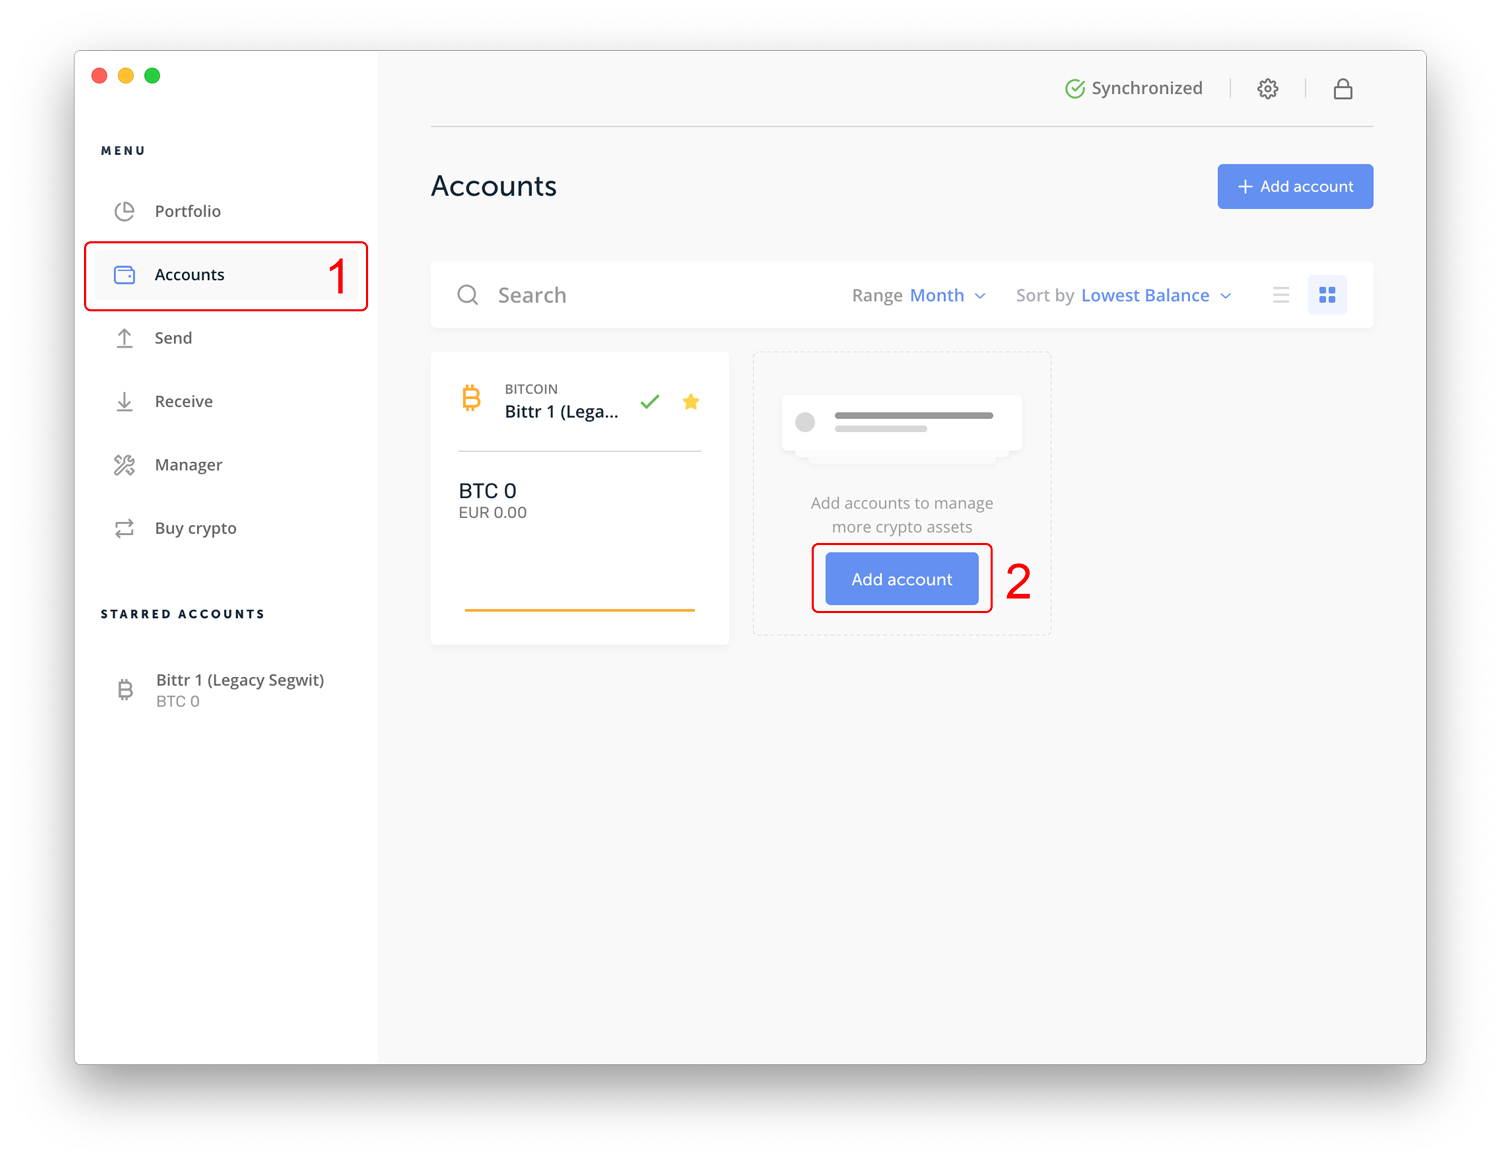
Connect your Ledger hardware wallet and open Ledger Live on your computer and then click on “Accounts” (Step 1). As you never want to share an extended public key of a wallet you have used in the past, you first click “Add Account” (Step 2), which you will only use for bittr!
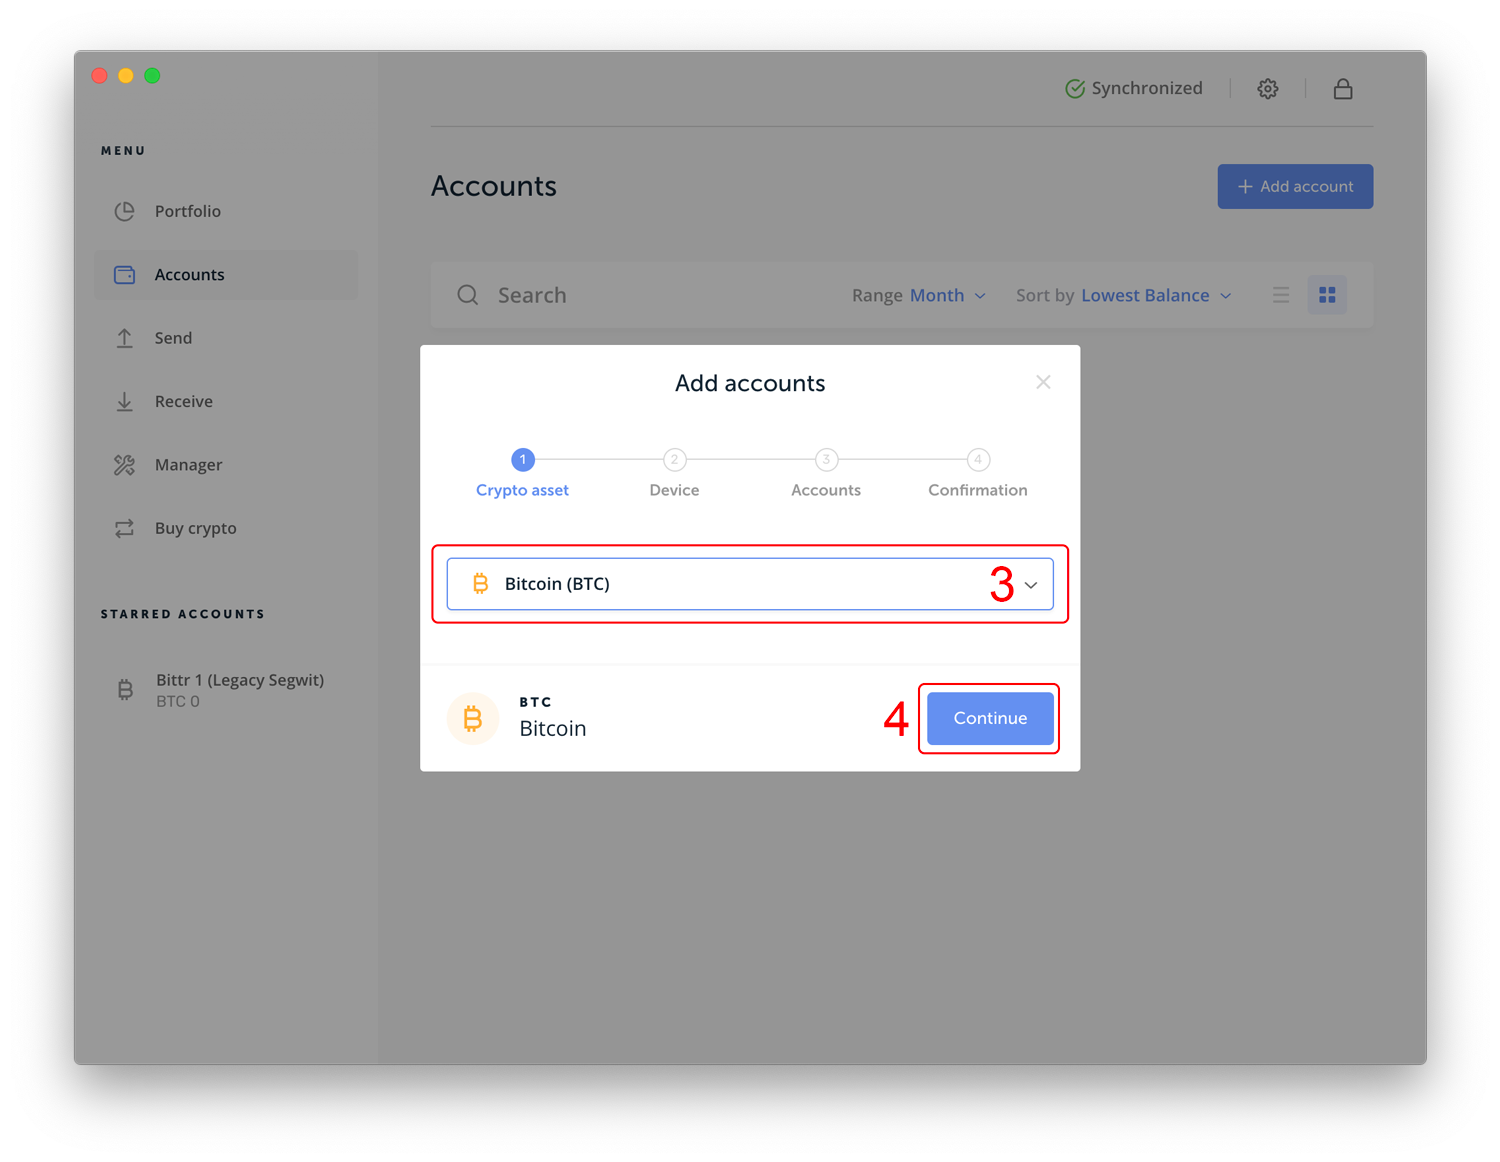
As we obviously would like to add a Bitcoin account, make sure “Bitcoin (BTC)” is selected (Step 3) and click “Continue” (Step 4).
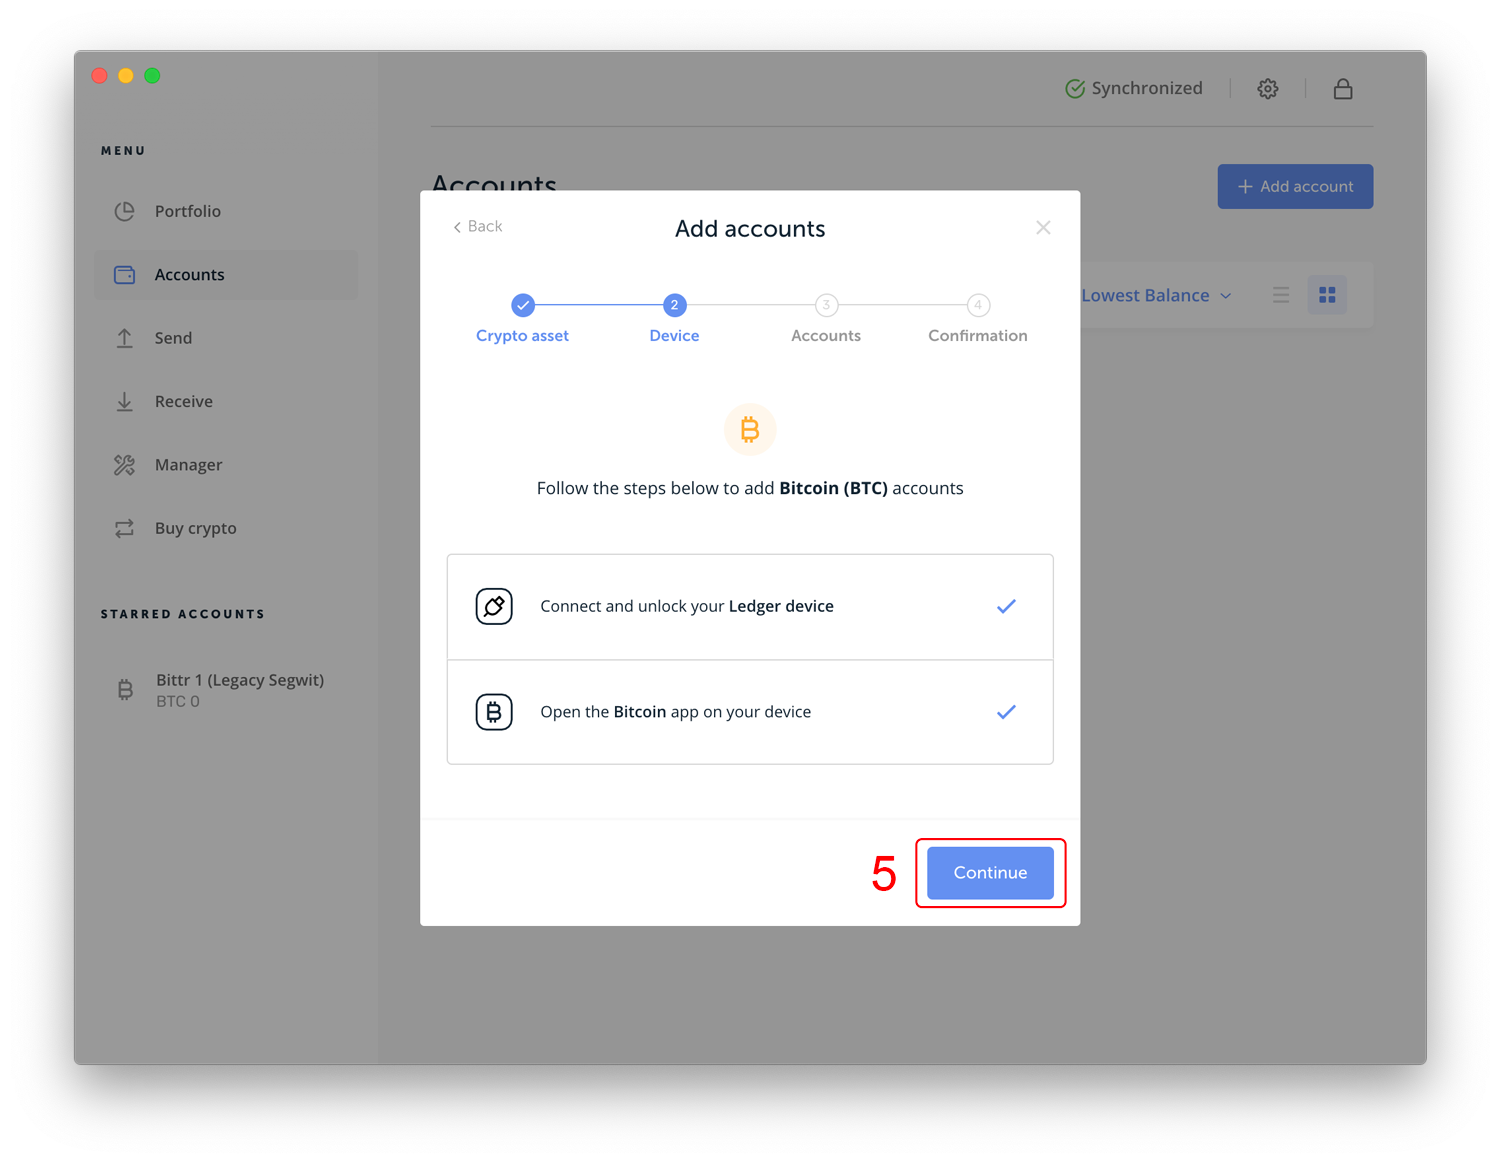
Make sure your Ledger hardware wallet is connected and that you open the bitcoin app on the Ledger wallet, then click “Continue” (Step 5).
Optionally, give your account a name, such as “Bittr Wallet” (Step 6) to easily identify this account (and not use it for any other purposes). Click “Add account” (Step 7) to finish the creation of your new account.
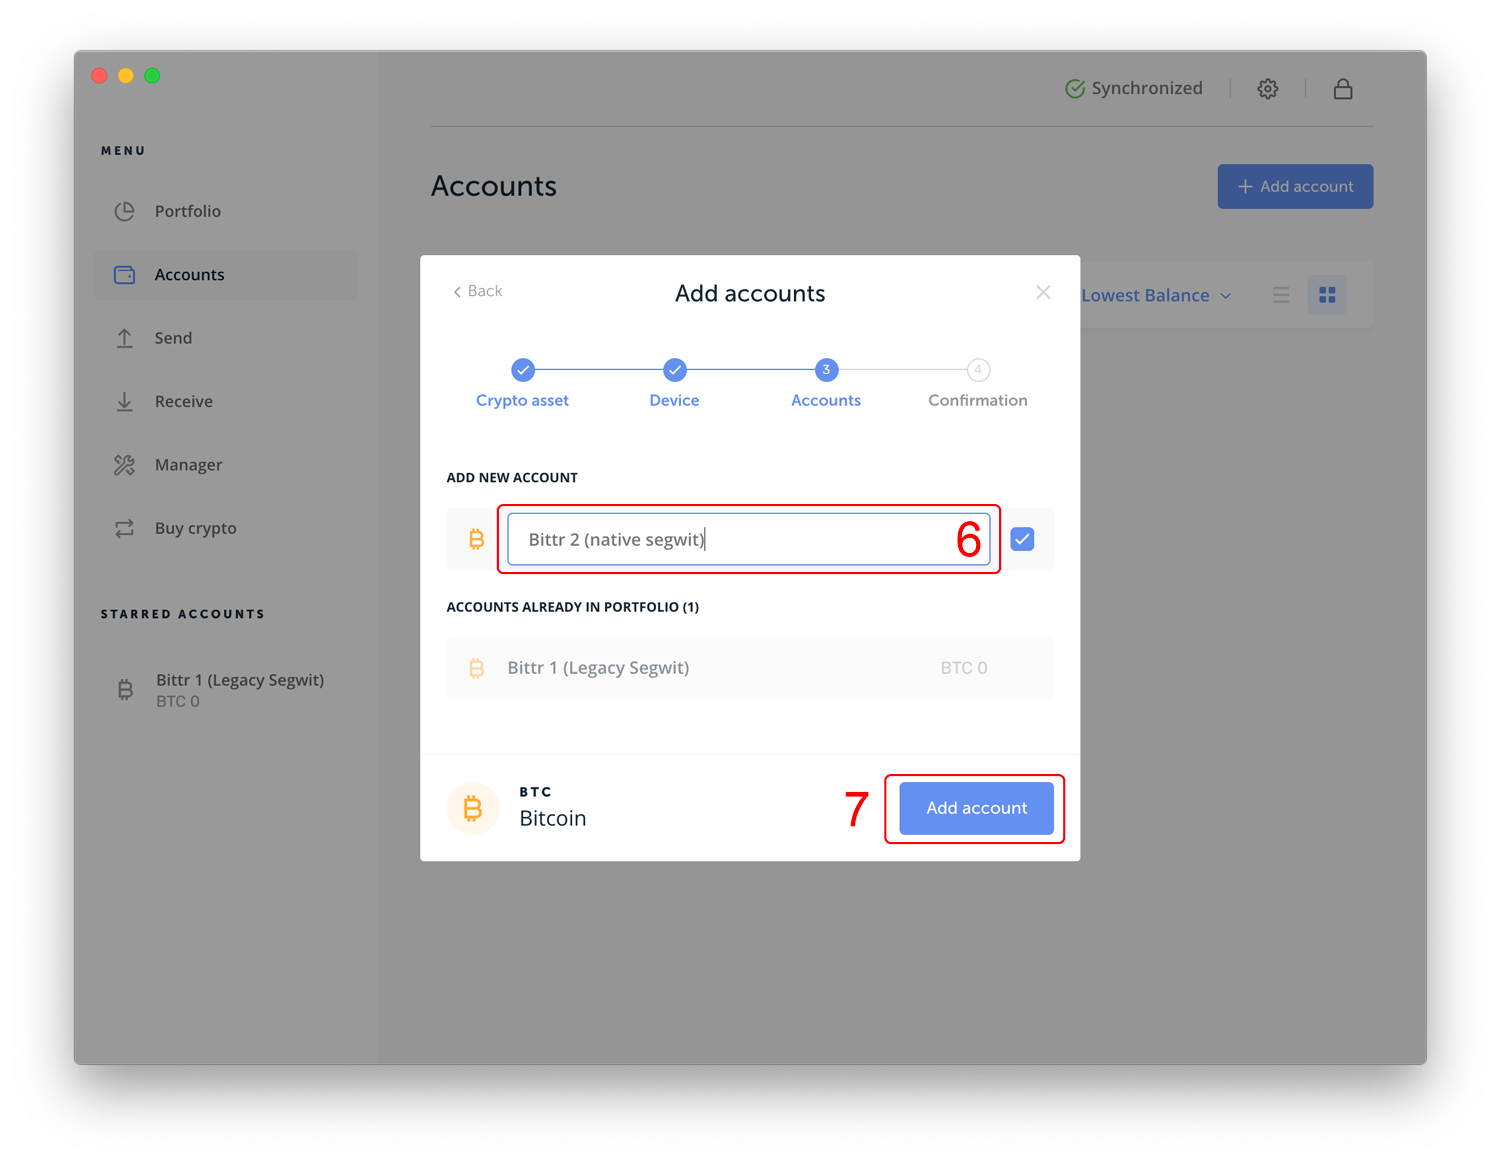
Click “Close” to exit the dialogue and continue to obtain your xpub for the newly created account.
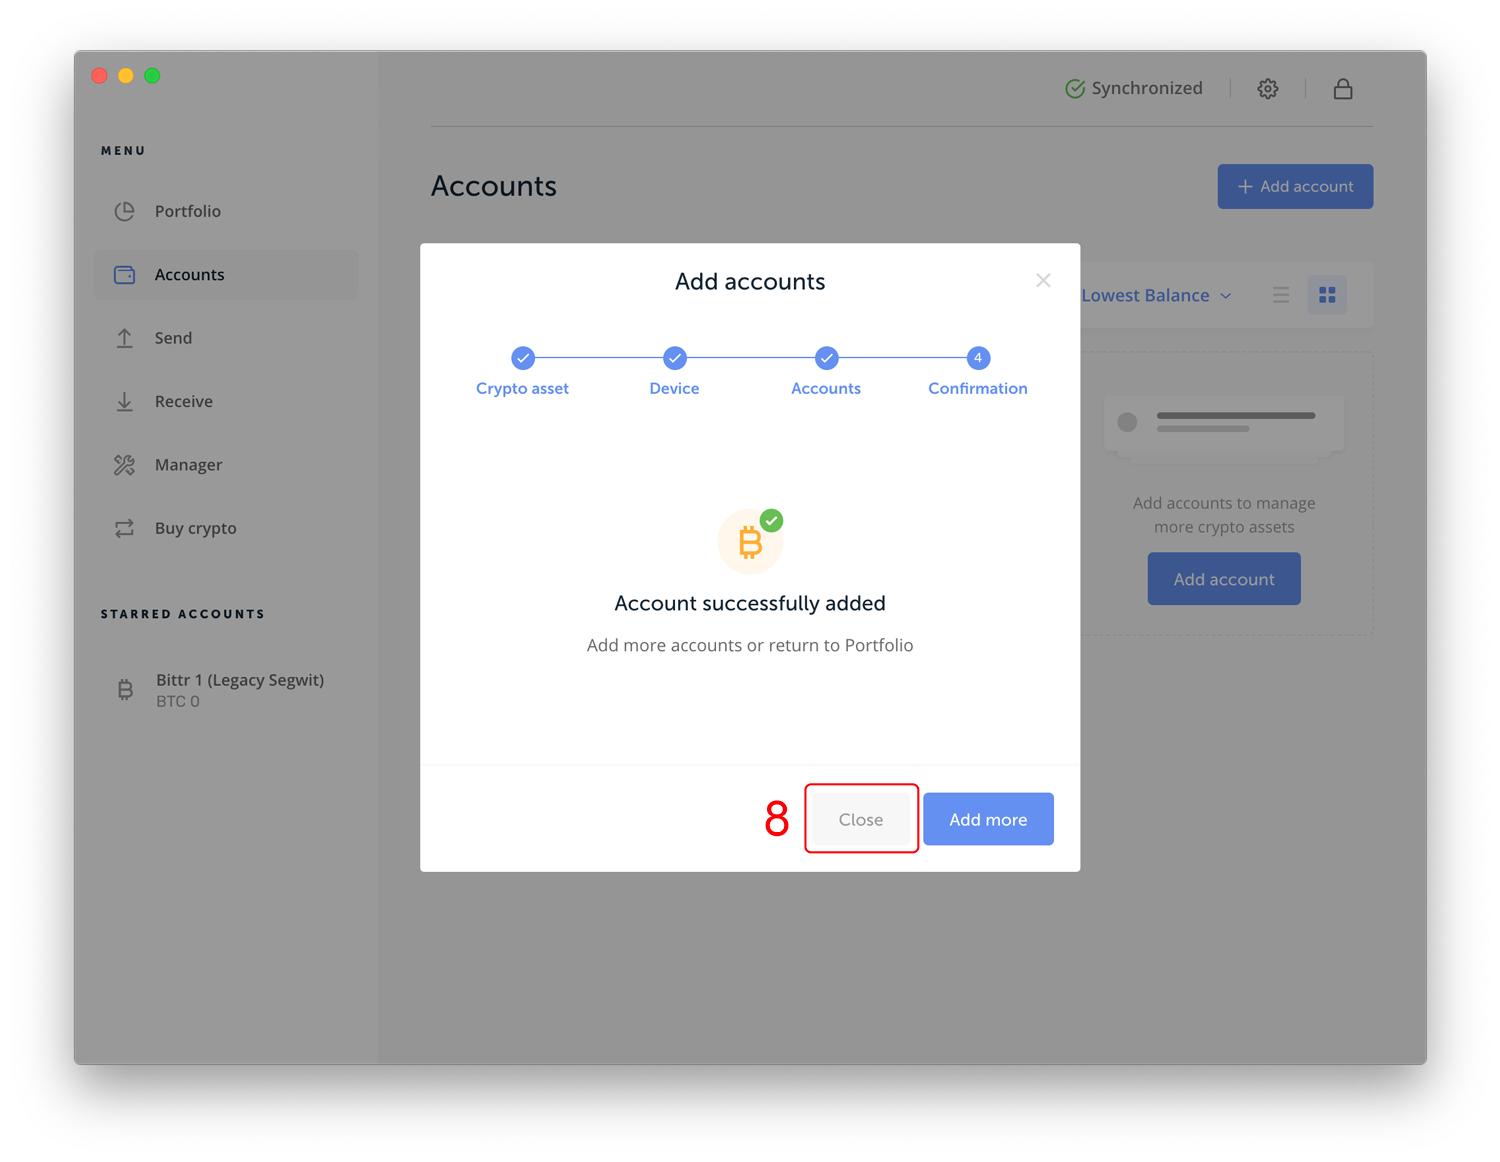
Click the tool (“Edit account”) in the upper right corner of the main screen (Step 9).
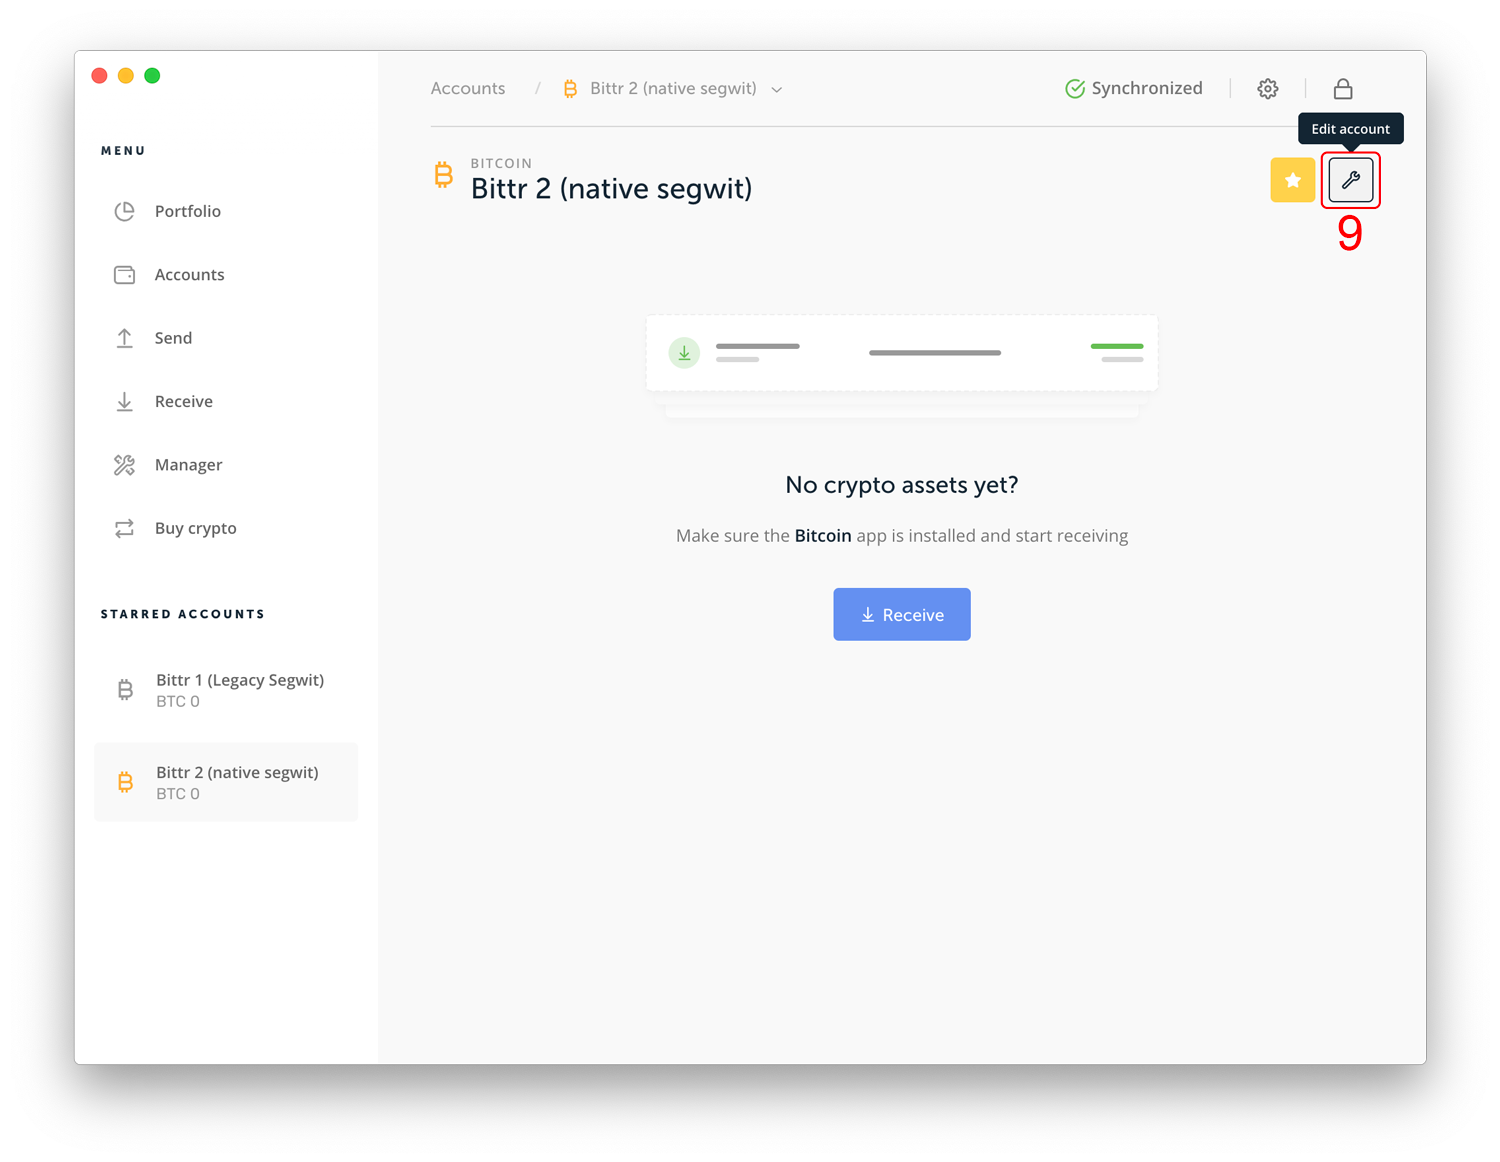
Click “Advanced Logs” (Step 10) so that the detailed information of your account becomes visible. Then copy your xpub into your clipboard (Command (⌘) / CTRL + C) so that you can later paste your xpub on the bittr website (Step 11).
It’s now time to create your account with bittr. Follow the steps as usual, by entering your e-mail address and mobile phone number. On the third step of registration, you’ll see a button for advanced users. Click “enter extended public key” to continue.
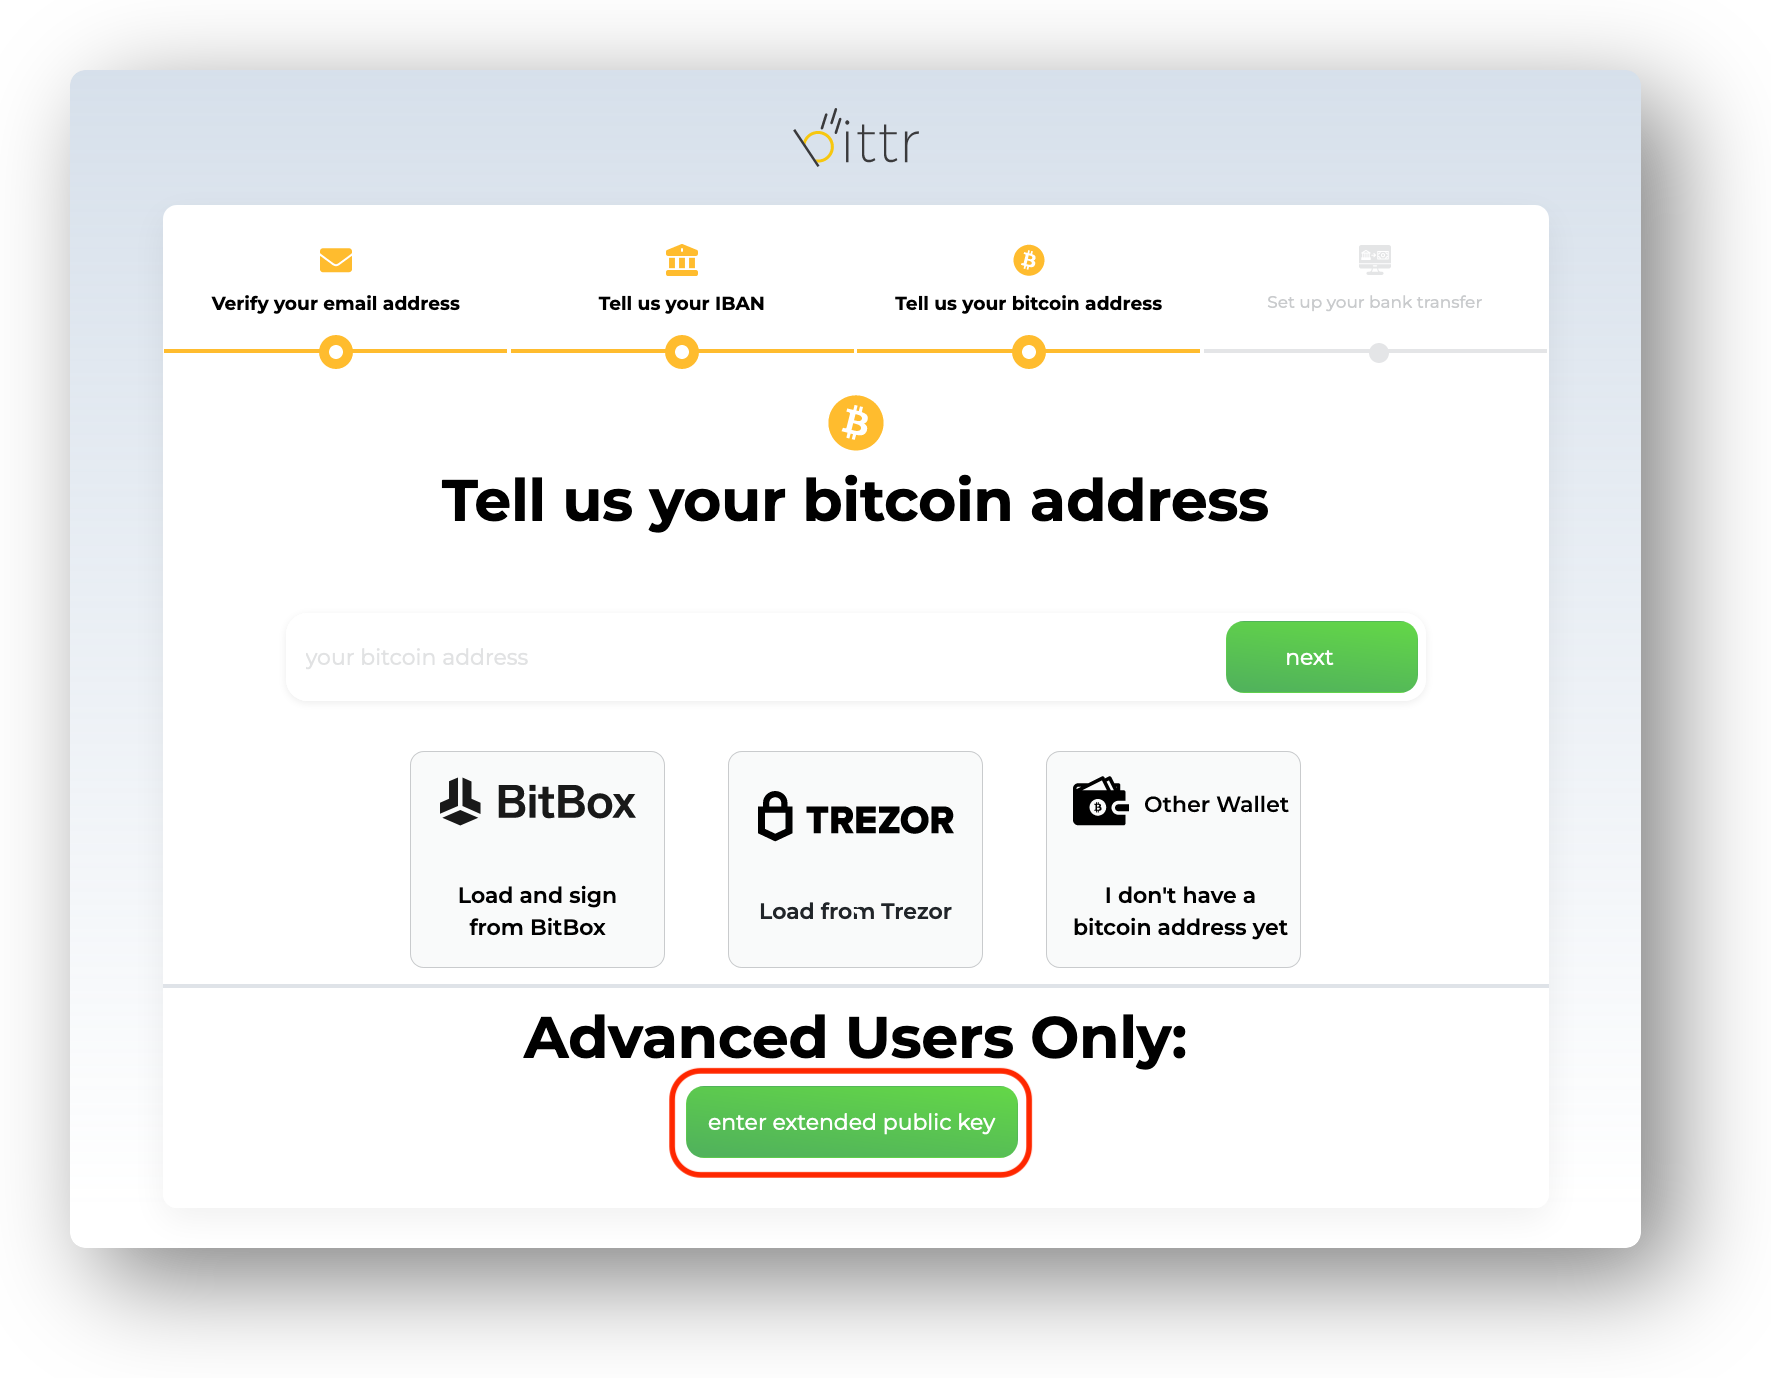
Paste your extended public key into the form.
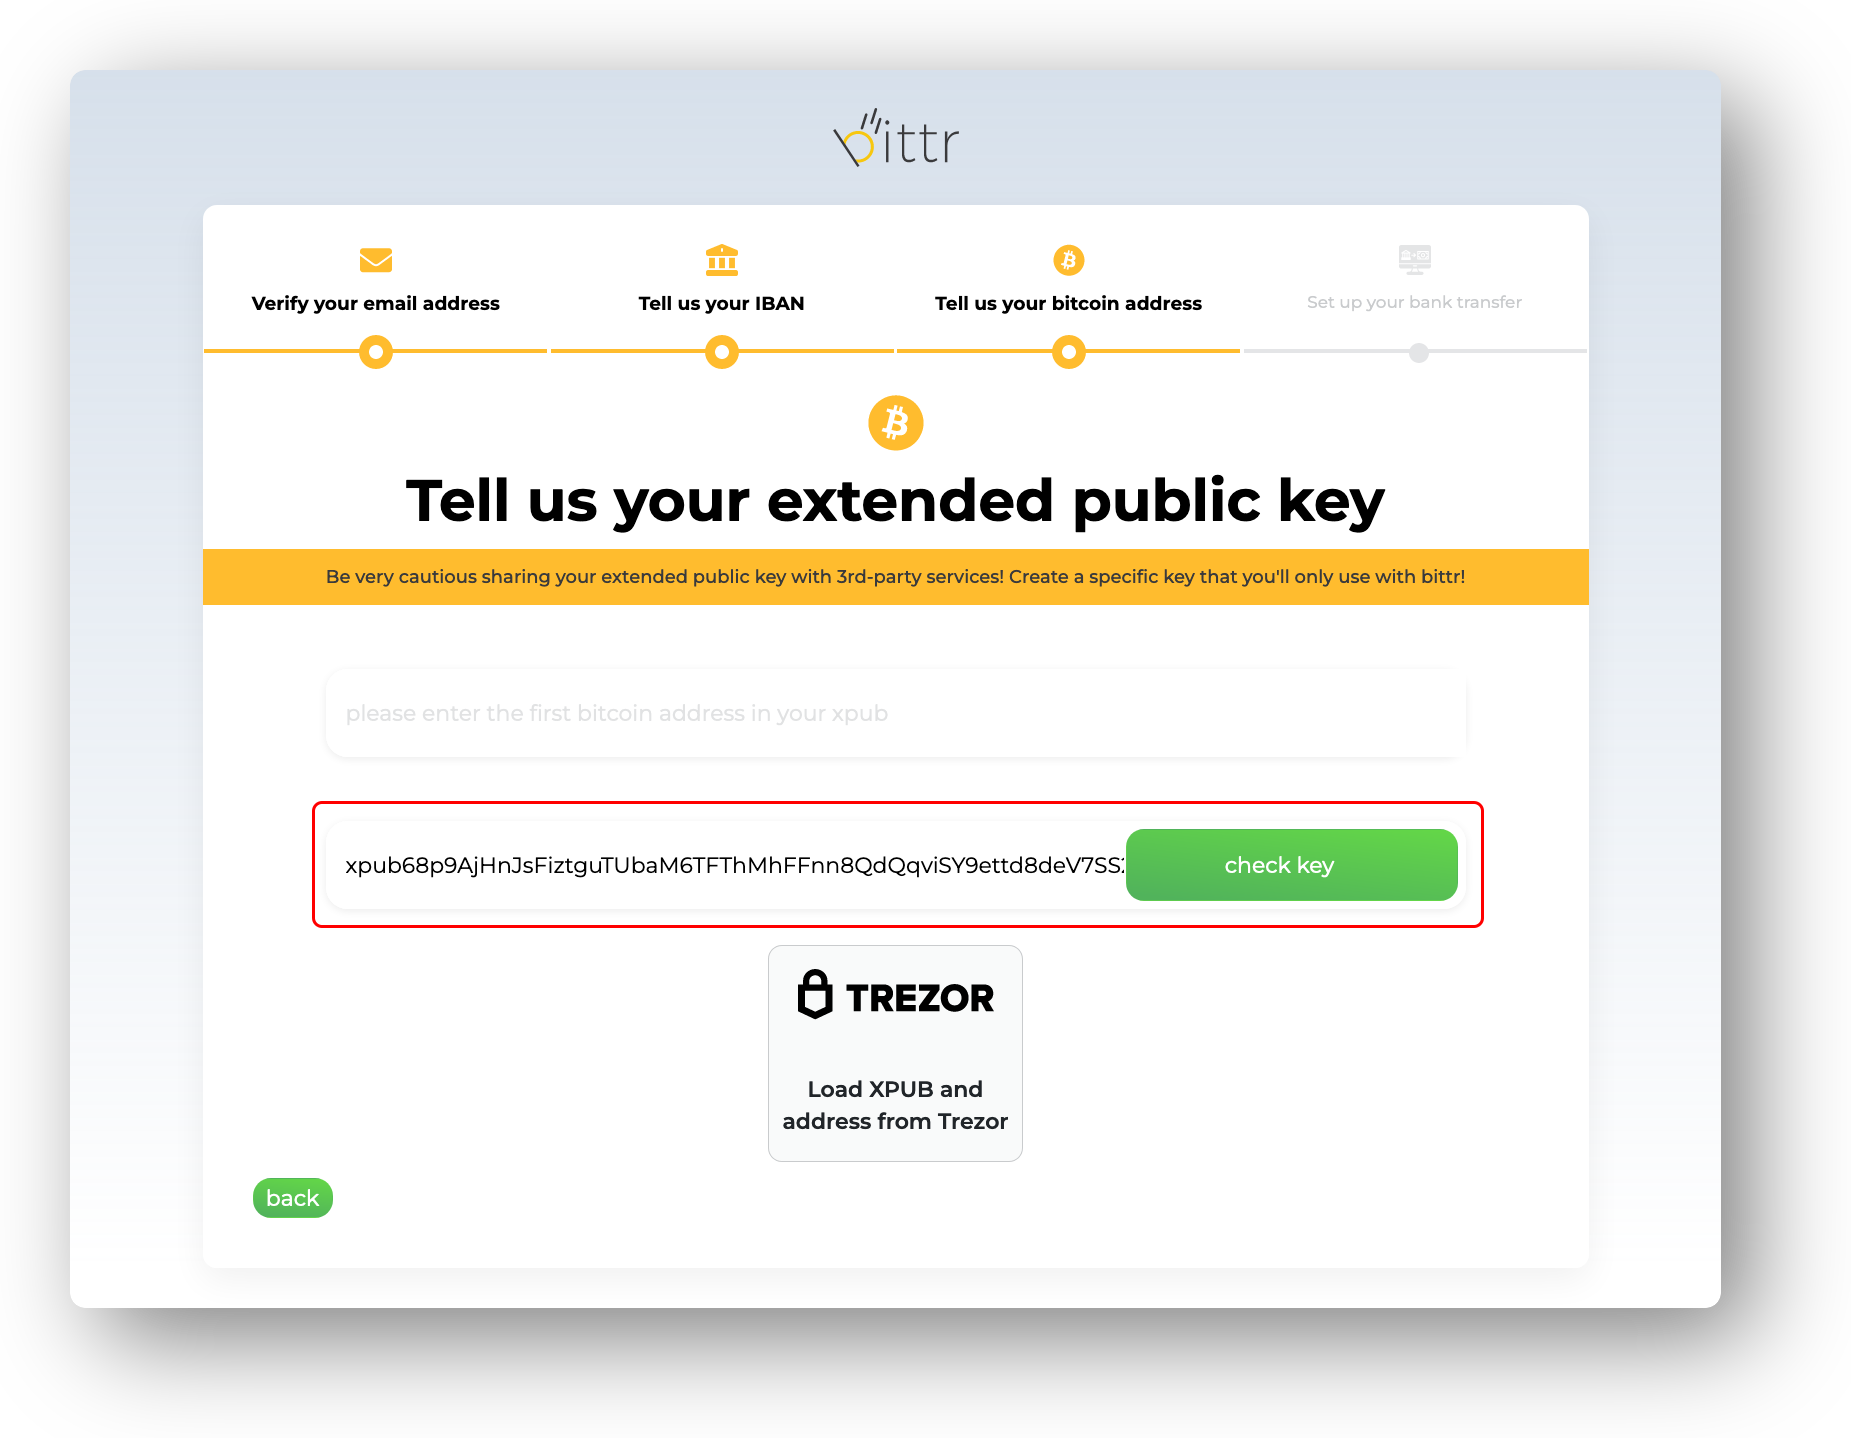
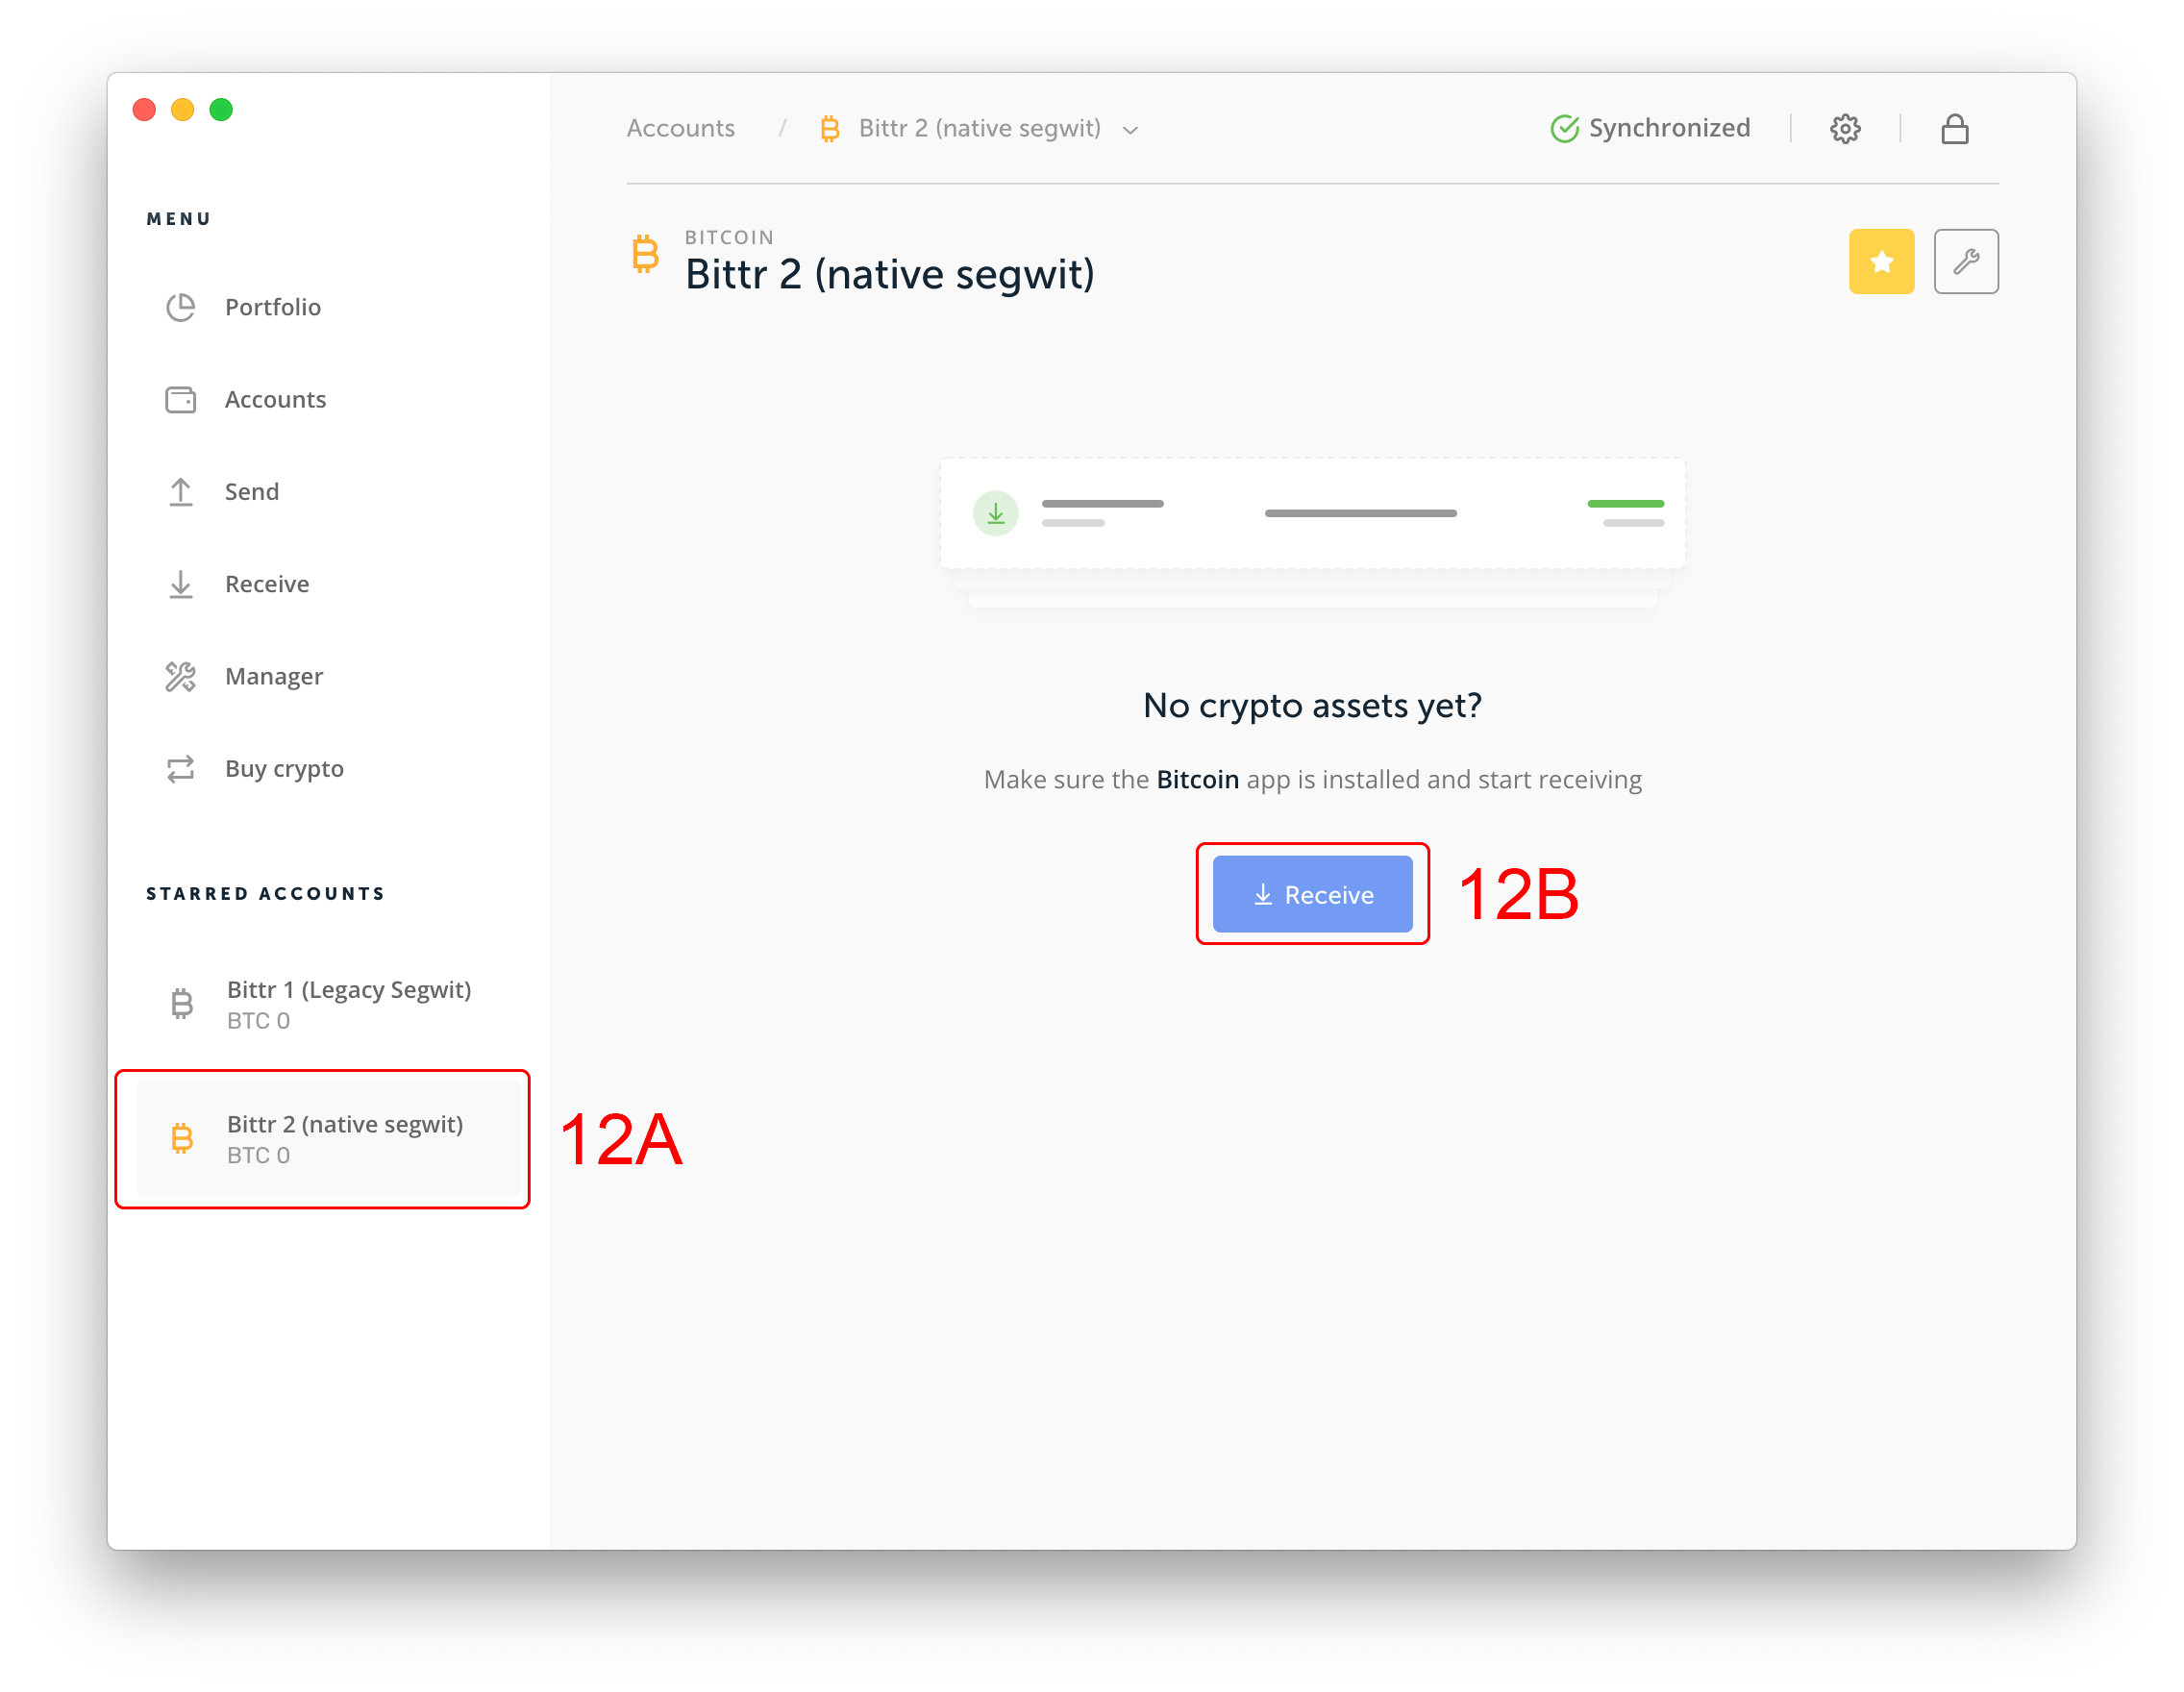
Besides the xpub, bittr will also require you to enter the first address in this xpub. Back in Ledger Live, click on the account you have newly created (Step 12A) and then click on “Receive” (Step 12B).
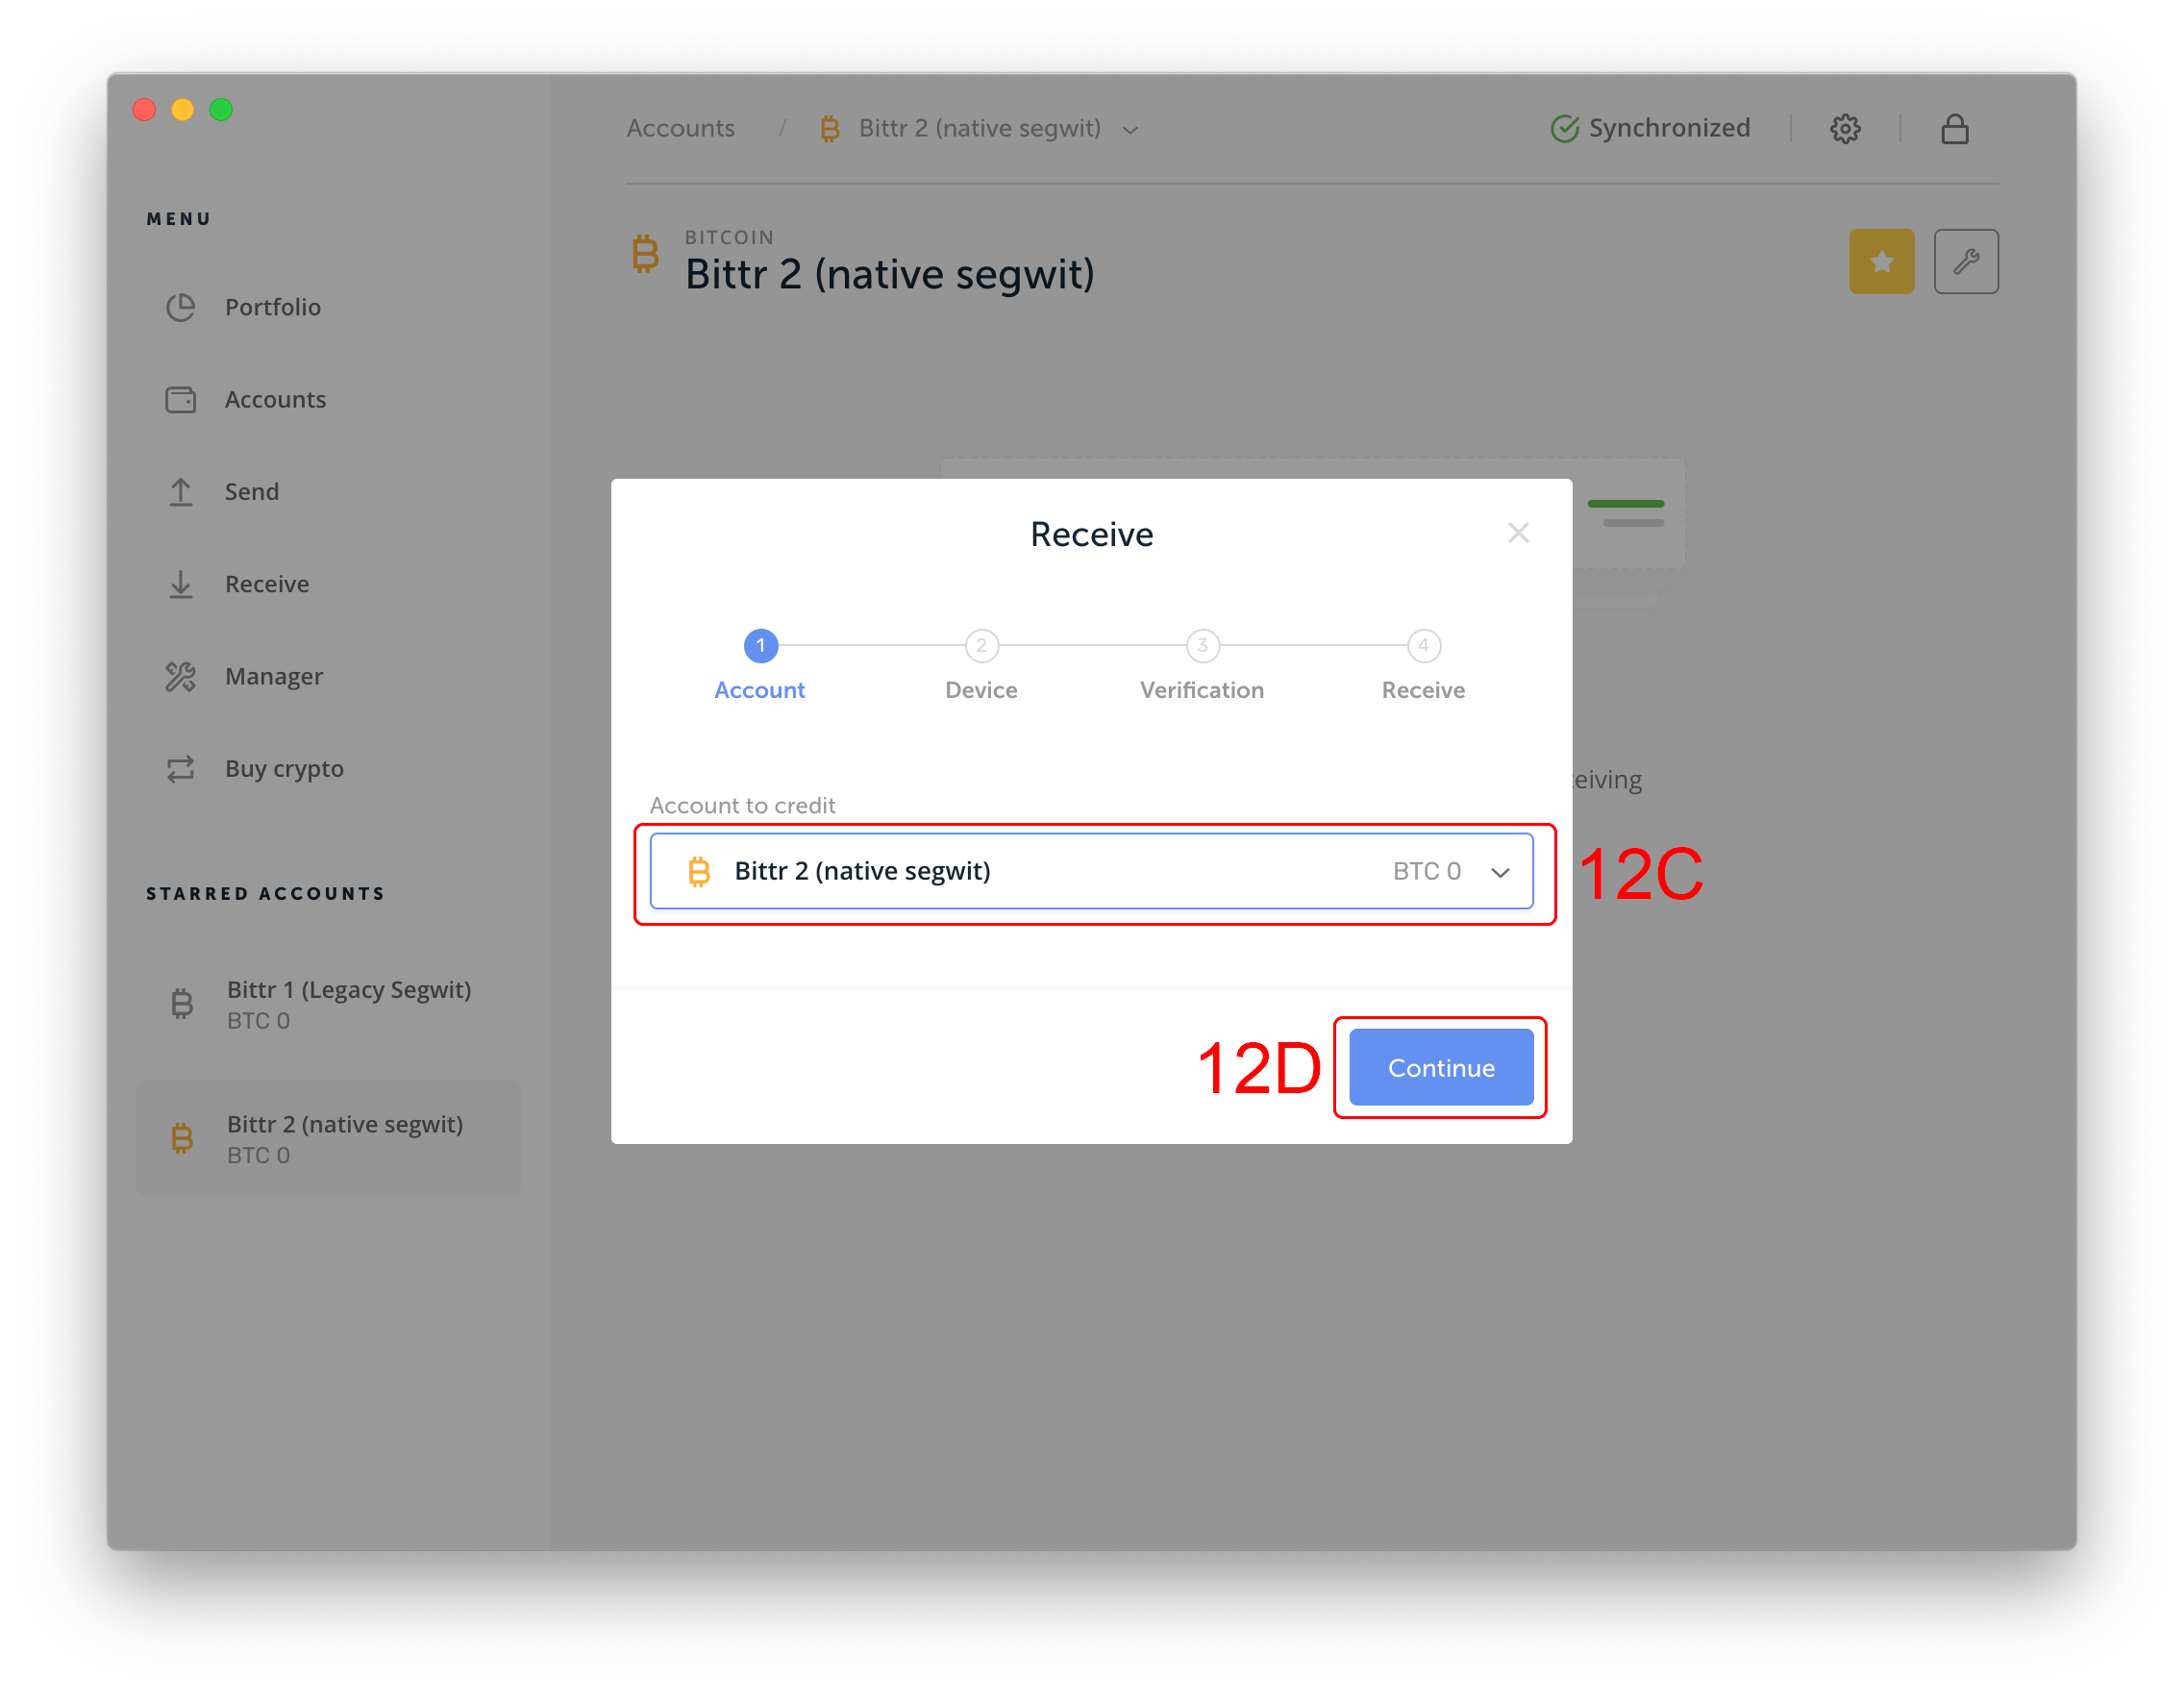
Once again, select the newly created account (Step 12C) and then click “Continue” (Step 12D).
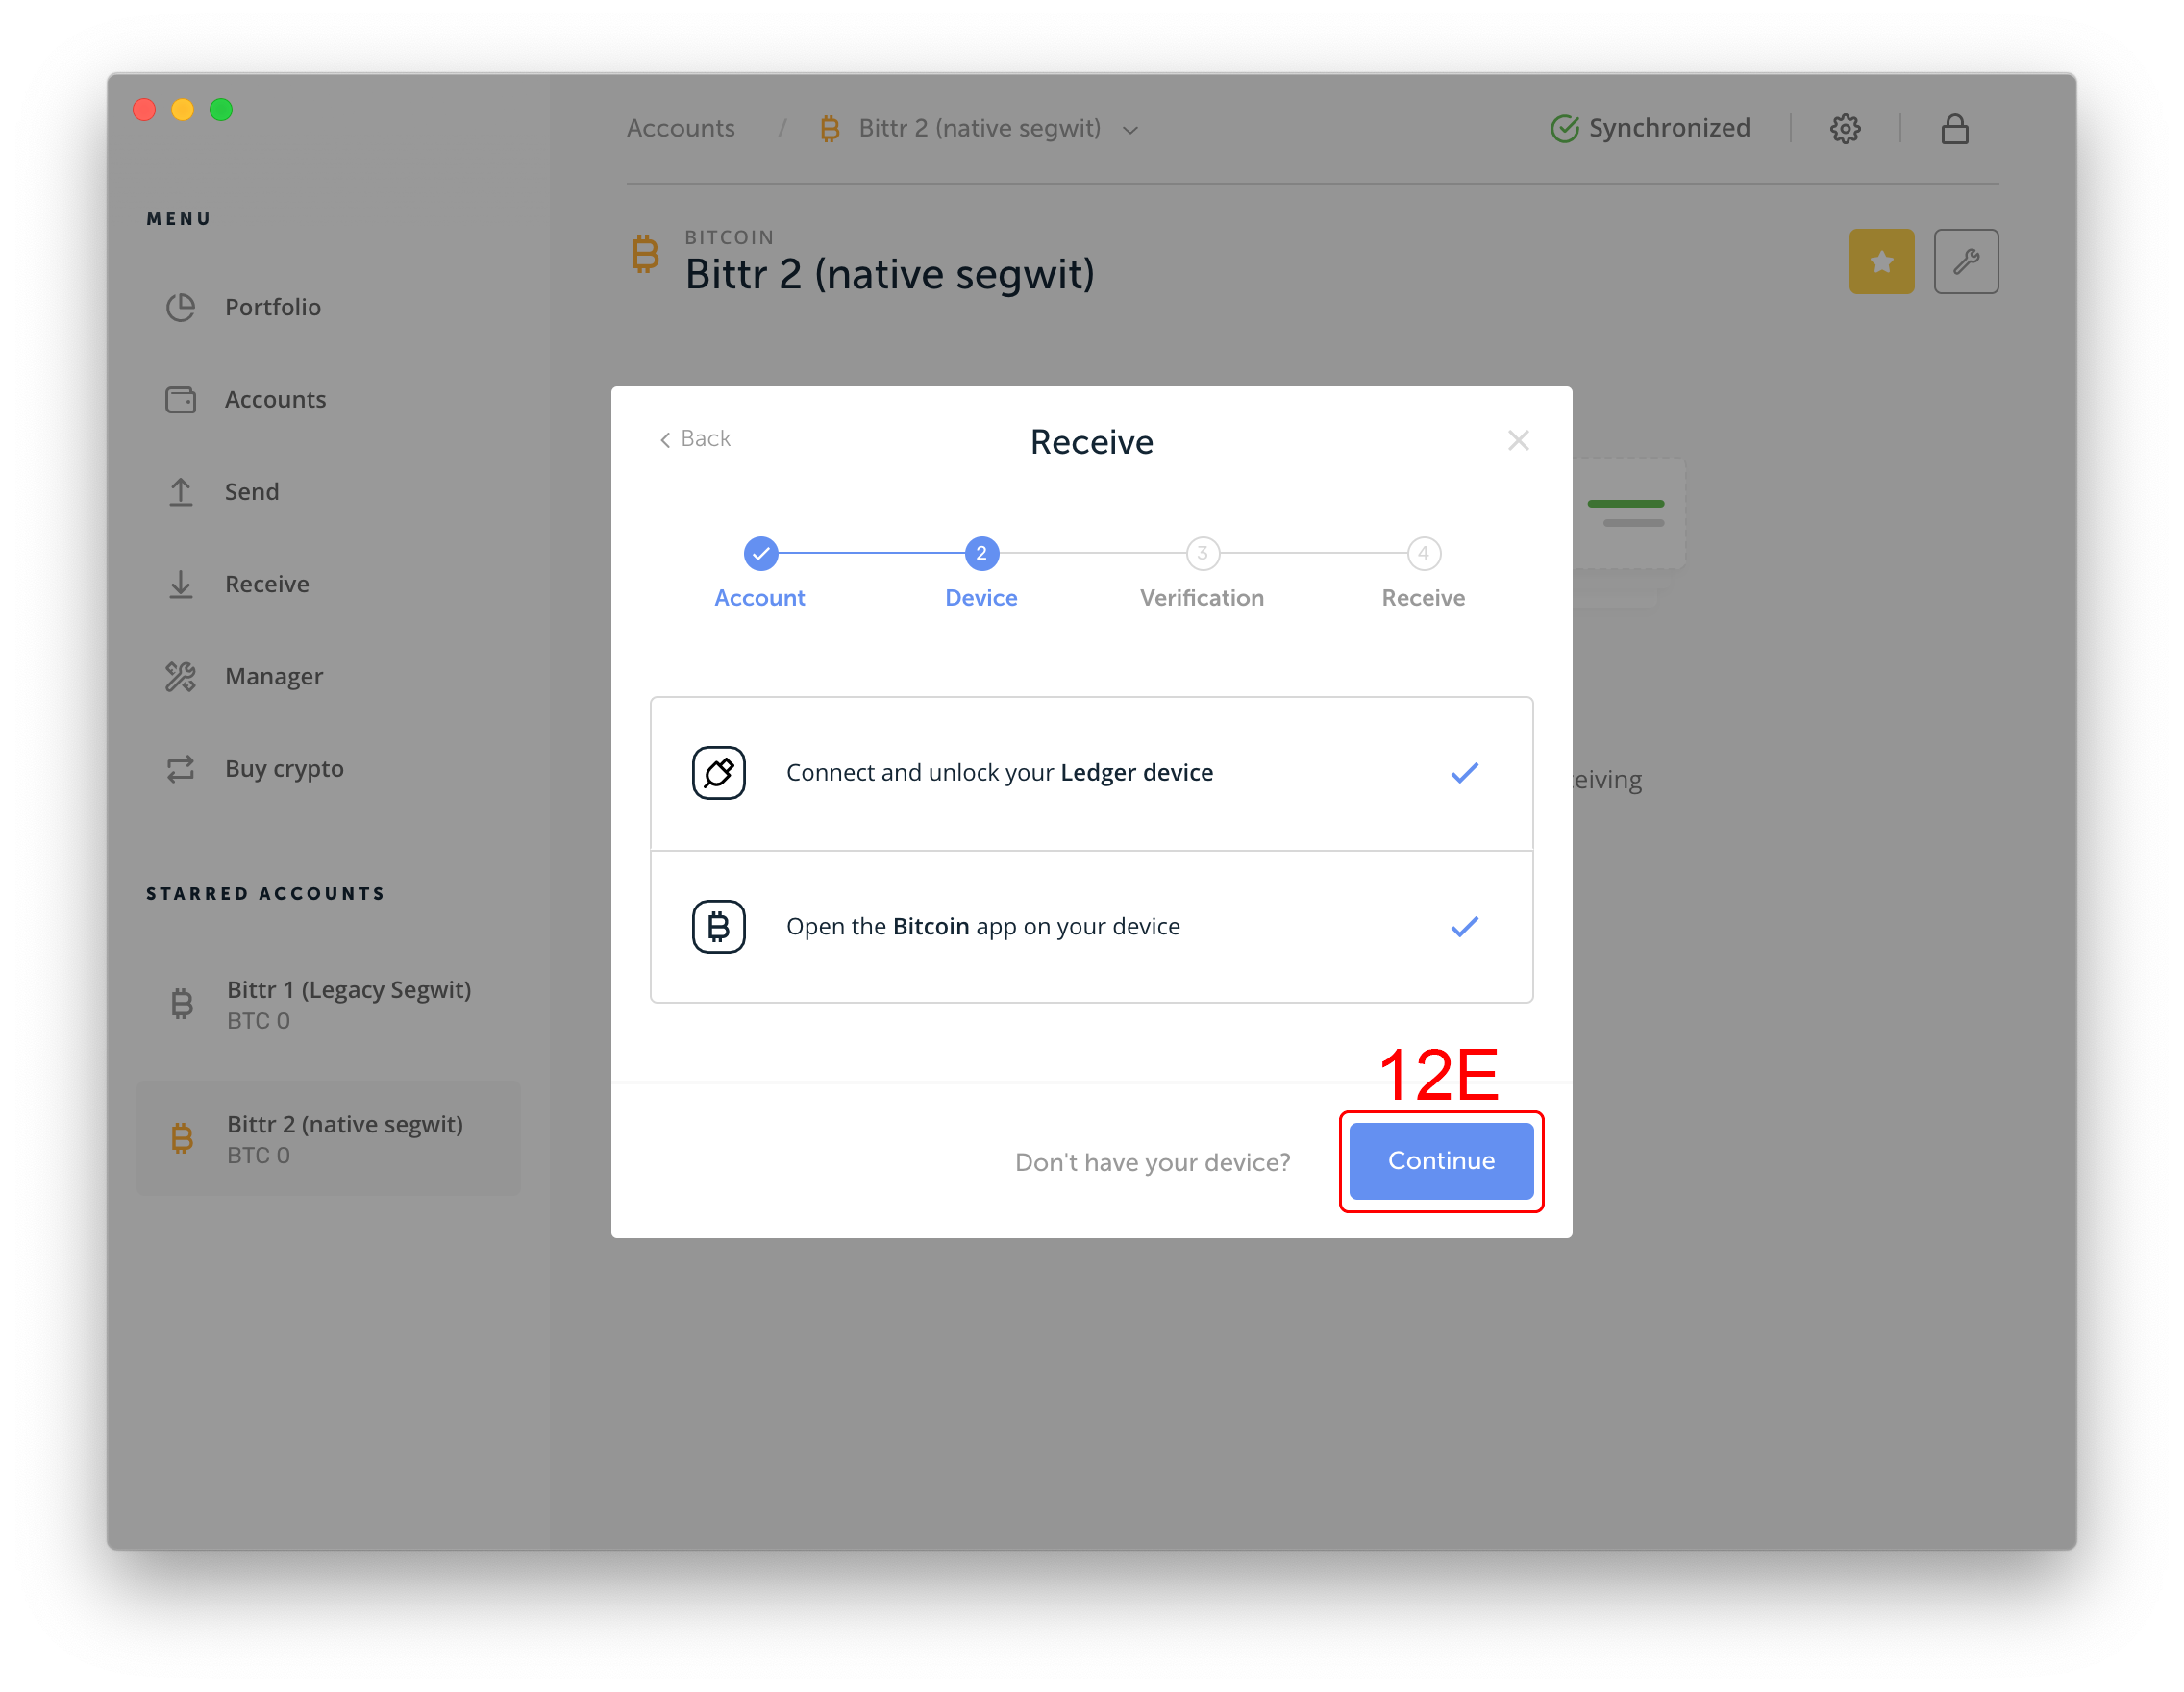
Make sure your Ledger wallet is connected and open the Bitcoin app on the Ledger wallet, then click “Continue” (Step 12E).
Now you’ll be shown the first address in this xpub (since you just created a fresh xpub). Then copy your address into your clipboard (Command (⌘) / CTRL + C) so that you can paste this address on the bittr website.
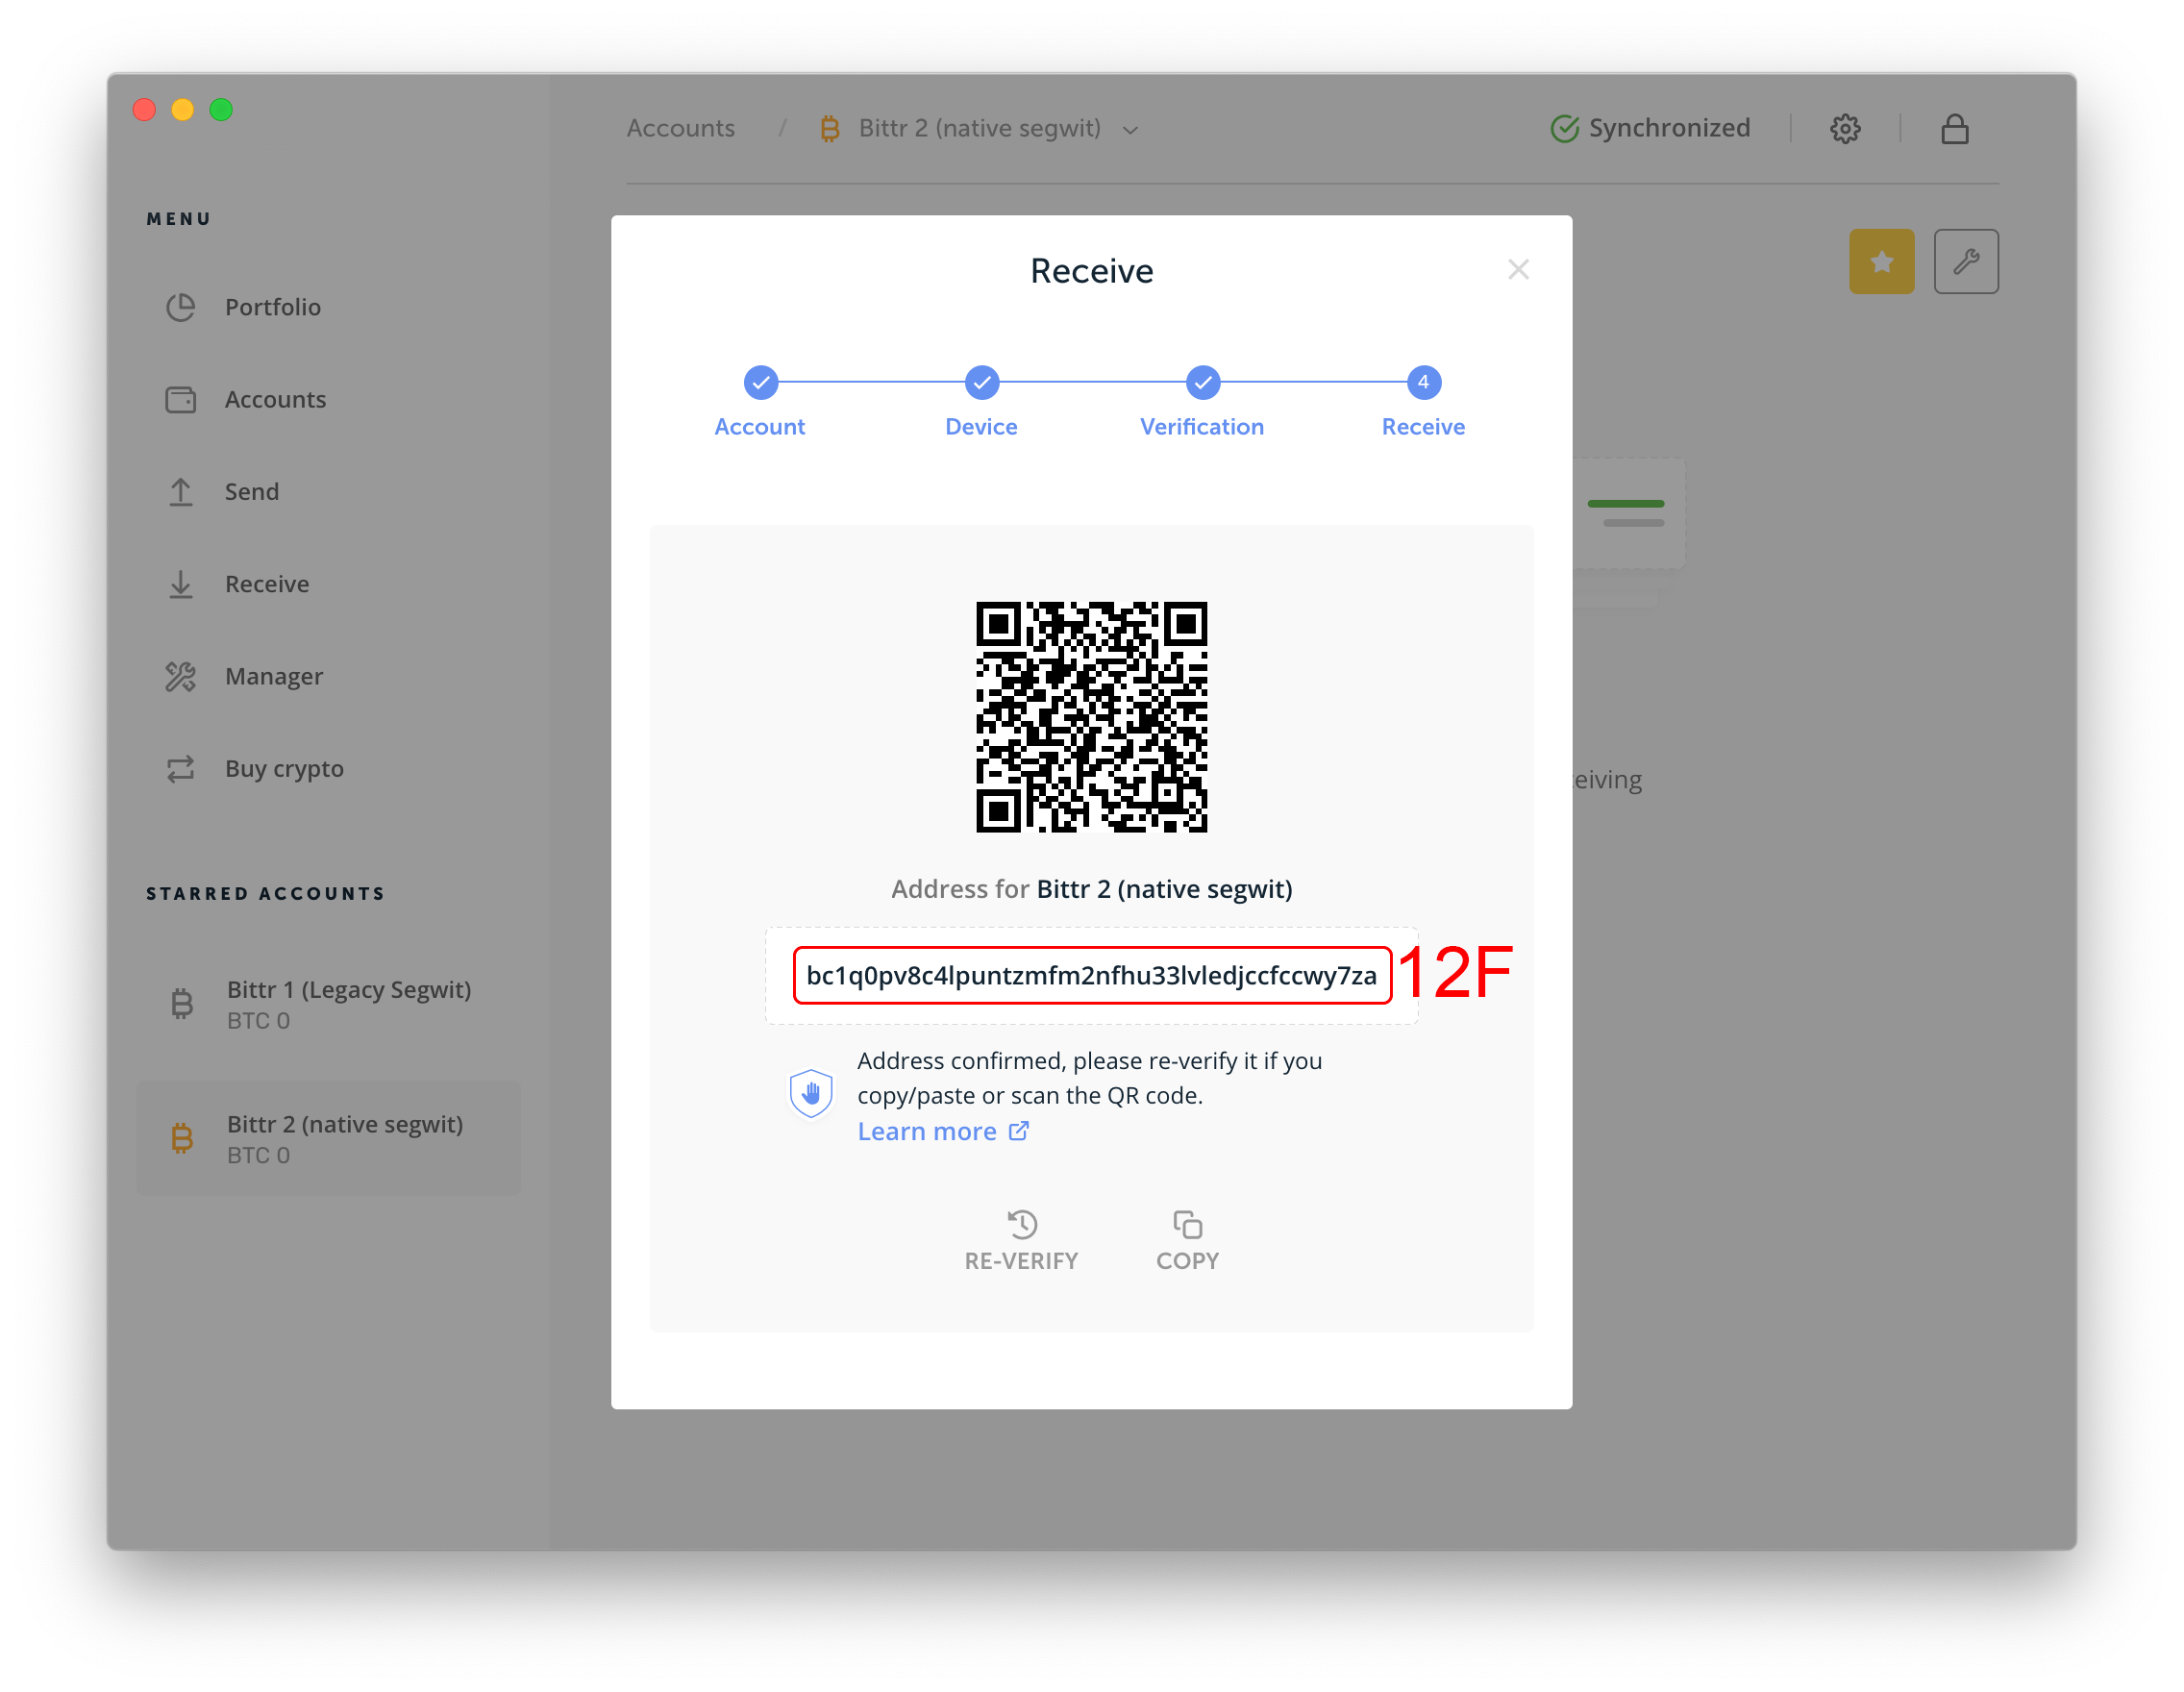
Now paste the bitcoin address from the previous step in the bitcoin address field on the bitttr website (Step 13). As bittr wants to make sure you’re entering an unused extended public key, you then click on “Check Key” (Step 14) in order to continue.

On the next screen of the bittr website, you will be asked to sign a message with your Ledger wallet. As Ledger Live still does not support this feature, you’ll have to use Electrum (or another wallet interface for your Ledger device), to sign a message with your Ledger wallet. If you’re not quite sure how to do this, we have a step-by-step guide available here.
Do you have any questions? Reach out to us at hello@getbittr.com.


