How do I obtain a new ypub from Trezor wallet?
In this blog post, we’ll walk you through the steps of using the ypub of your Trezor hardware wallet in combination with bittr. If you would first like to know a bit more about extended public keys (xpub, ypub, zpub), we’d recommend you to read this blogpost first.
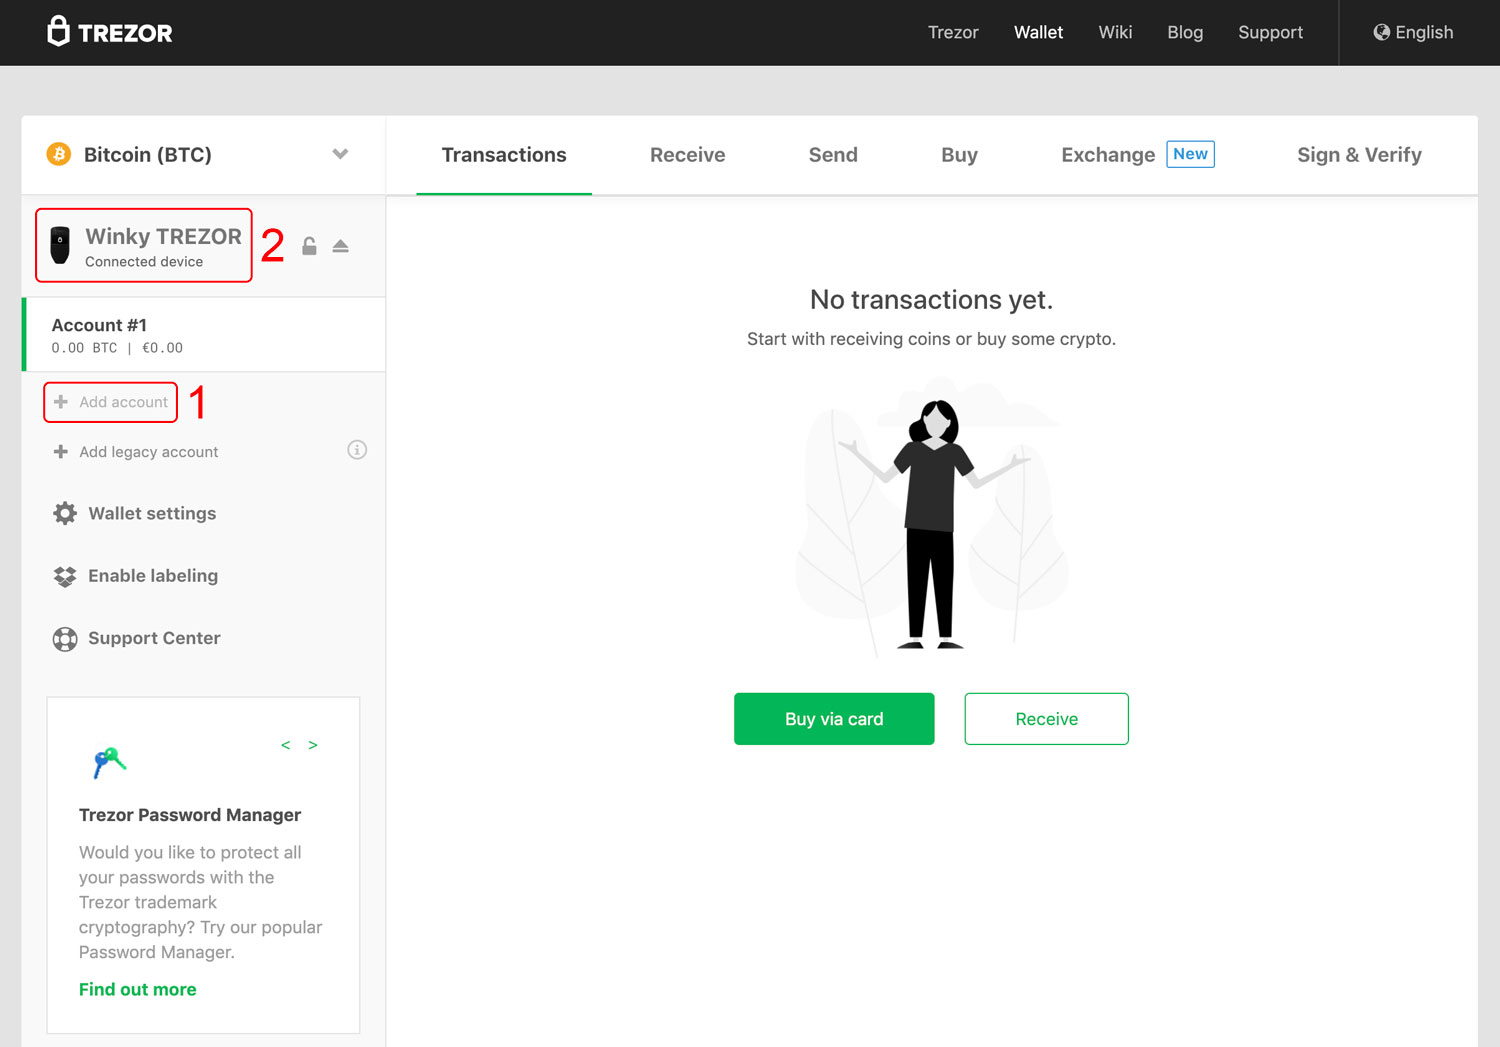
First of all, connect your Trezor hardware wallet and go the Trezor wallet interface. As you never want to share your actual extended public key, you first click “Add Account” (Step 1), which you will only use for bittr! You then click on the name of your Trezor (Step 2) to go to the next screen.
In this screen, you click on “Show XPUBs” (Step 3) in order to reveal the extended public keys of your Trezor wallet.

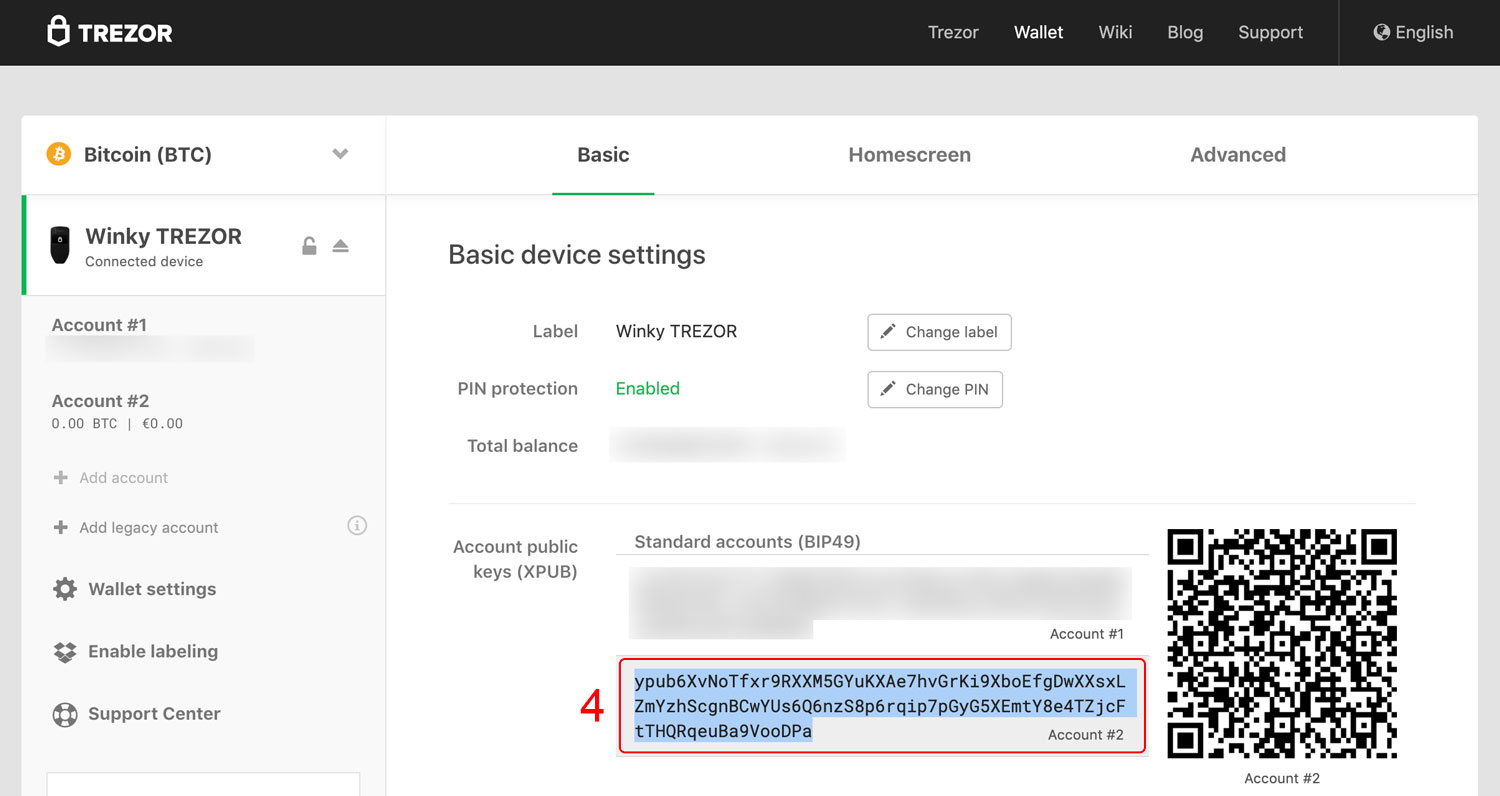
Now that your extended public keys are visible, you’ll select the ypub belonging to the last account you’ve created (this account should have a balance of 0 and no previous transactions). You copy this ypub into your clipboard (Step 4) so that you can later paste it on bittr’s website.
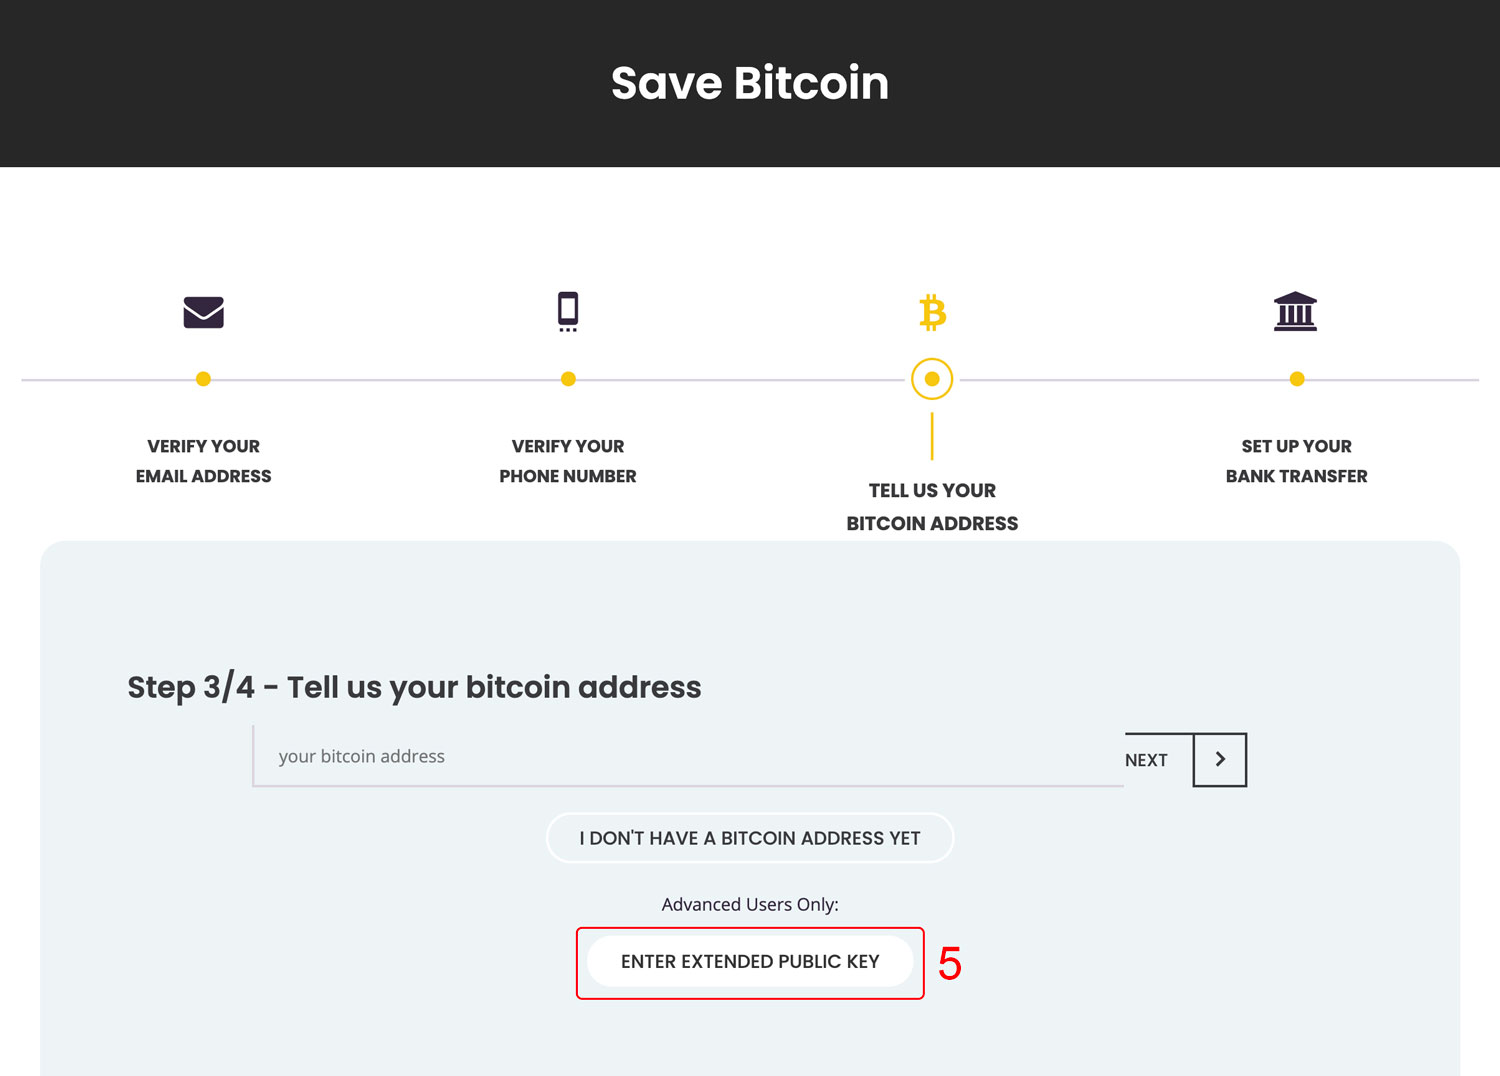
It’s now time to create your account with bittr. Follow the steps as usual, by entering your e-mail address and mobile phone number. On the third step of registration, you’ll see a button for advanced users. Click “Enter Extended Public Key” (Step 5) to continue.
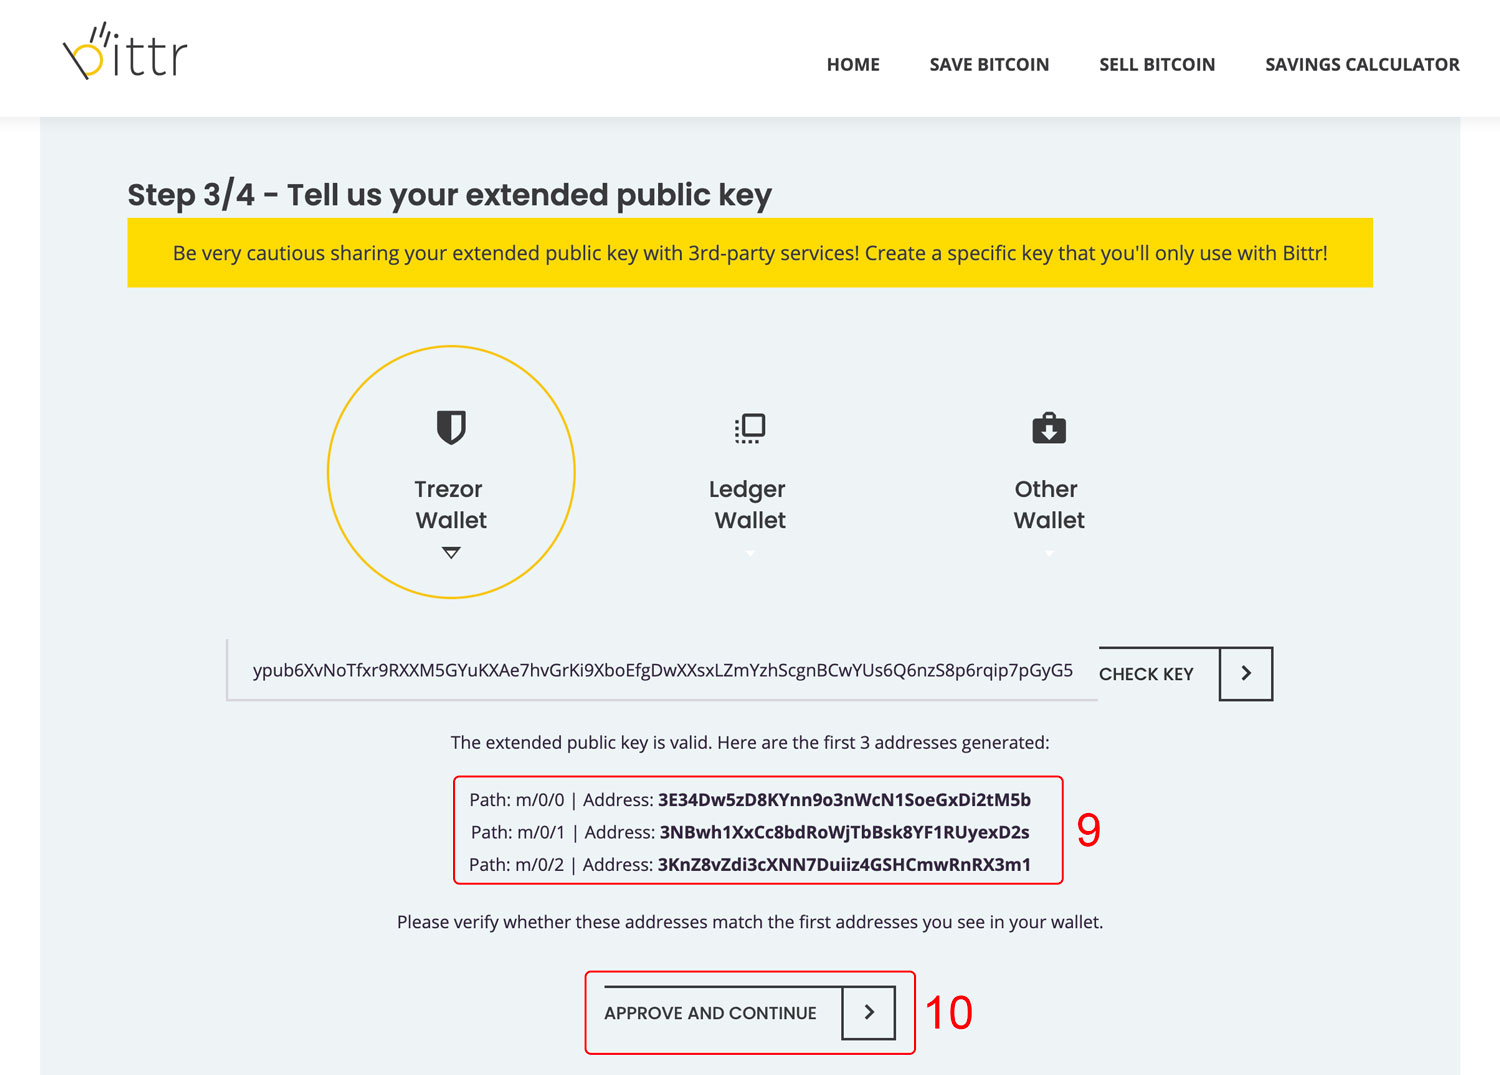
As you’re using a Trezor wallet, click “Trezor Wallet” (Step 6) and paste your extended public key into the form (Step 7). As bittr wants to make sure you’re entering an unused extended public key, you then click on “Check Key” (Step 8) in order to continue.

You’ll see a warning message that checking your key may take up to 1 minute, after which the first three addresses of the wallet are shown. It’s extremely important to verify whether these addresses match with what you see in your Trezor, when you go to the “Receive” tab of your wallet (Step 9). Once you’ve confirmed the addresses, you can click “Approve and Continue” (Step 10) to finish your registration.
That’s it! You now have an account with bittr in which each of your recurring deposits is automatically sent to a new address belonging to you!
Do you have any questions? Reach out to us at hello@getbittr.com.